AWS Fleet Hub

AWS Fleet Hub is a service within Amazon Web Services that allows you to easily manage and monitor your fleet of IoT devices. With Fleet Hub, you can easily connect, monitor, and control your devices from a single, centralized location.

In this blog post, we will walk through the process of connecting an ESP32 microcontroller to AWS Fleet Hub for device monitoring.
Step 1: Create an AWS account
The first step in connecting your ESP32 to AWS Fleet Hub is to create an AWS account. If you already have an AWS account, you can skip this step.
To create an AWS account, go to the AWS website and click on the "Create a new AWS account" button. You will be prompted to enter your email address and create a password.
Step 2: Create a Thing in AWS IoT Core
Once you have an AWS account, you will need to create a Thing in AWS IoT Core. A Thing is a representation of a device in AWS IoT Core.
To create a Thing, log in to the AWS Management Console and navigate to the AWS IoT Core dashboard. From there, click on the "Things" menu and then click on the "Create" button.
Enter a name for your Thing and click on the "Create" button. Once your Thing is created, you will be given a unique Thing ARN (Amazon Resource Name) that you will use later in the process.
Step 3: Register your ESP32 with AWS IoT Core
Now that you have created a Thing in AWS IoT Core, you will need to register your ESP32 with the service. To do this, you will need to download and install the AWS IoT Device SDK for Arduino on your ESP32.
The AWS IoT Device SDK for Arduino is a collection of libraries and sample applications that make it easy to connect your ESP32 to AWS IoT Core. Once you have the SDK installed on your ESP32, you can use the sample applications to register your device with AWS IoT Core and start sending data to the service.
Step 4: Connect your ESP32 to AWS Fleet Hub
Once your ESP32 is registered with AWS IoT Core, you can connect it to AWS Fleet Hub. To do this, you will need to create a Fleet in Fleet Hub and add your ESP32 to the Fleet.
To create a Fleet, log in to the AWS Management Console and navigate to the AWS Fleet Hub dashboard. From there, click on the "Fleets" menu and then click on the "Create" button.
Enter a name for your Fleet and click on the "Create" button. Once your Fleet is created, you will be given a unique Fleet ARN (Amazon Resource Name) that you will use later in the process.
To add your ESP32 to the Fleet, navigate to the Fleet Hub dashboard and click on the "Devices" menu. From there, click on the "Add Device" button and enter the Thing ARN for your ESP32.
Step 5: Monitor your ESP32 with AWS Fleet Hub
Once your ESP32 is connected to AWS Fleet Hub, you can use the service to monitor the device. You can view the current status of the device, see historical data, and even control the device remotely.
To view the status of your ESP32, navigate to the Fleet Hub dashboard and click on the "Devices" menu. From there, you can view the current status of the device and see historical data.
You can also use Fleet Hub to control your ESP32 remotely. To do this, navigate to the Fleet Hub dashboard and click on the "Actions" menu. From there, you can control the device by sending commands to the ESP
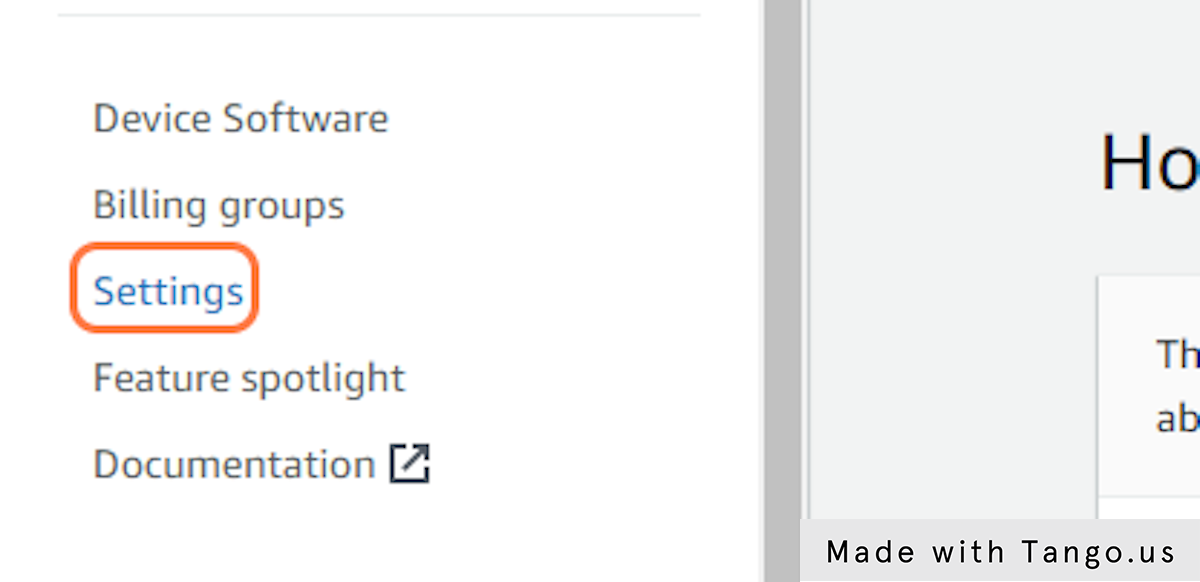
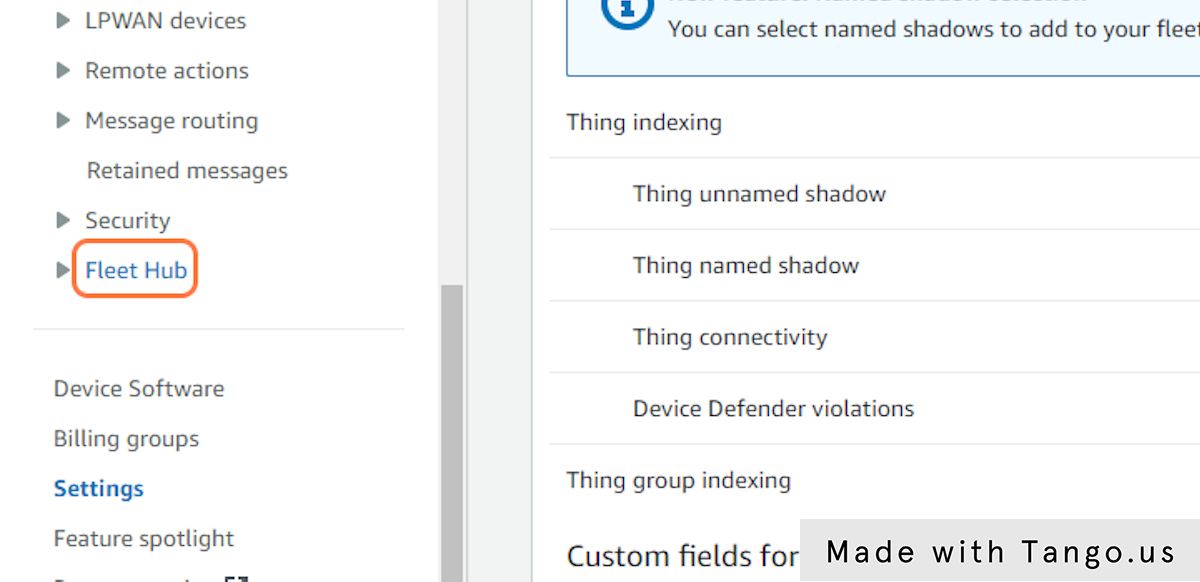
2. Click on Settings
3. Click on Manage indexing

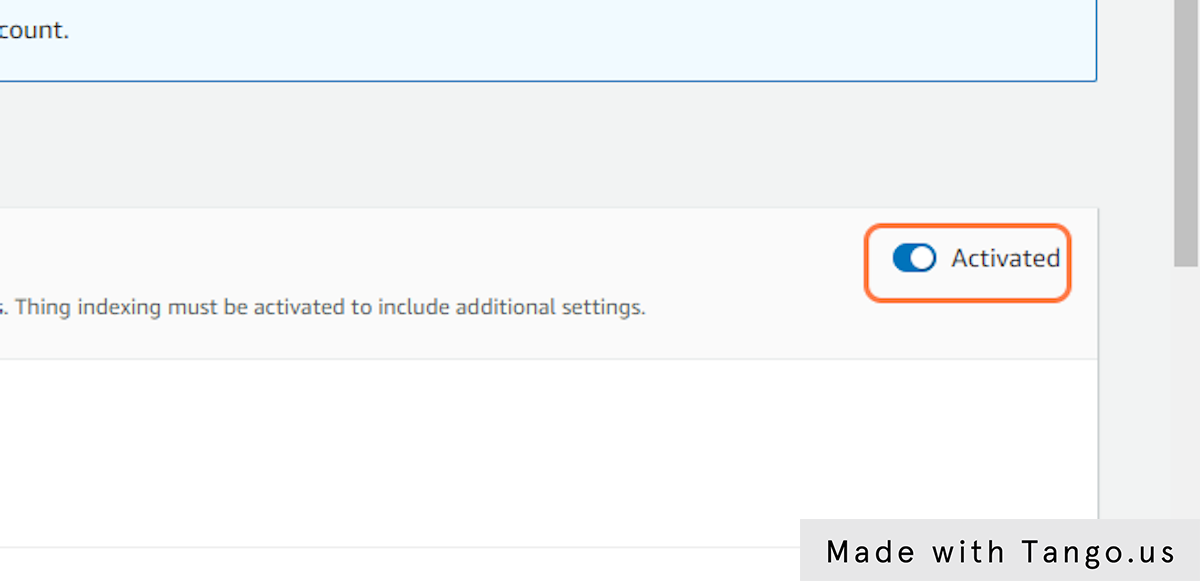
4. Check Activated
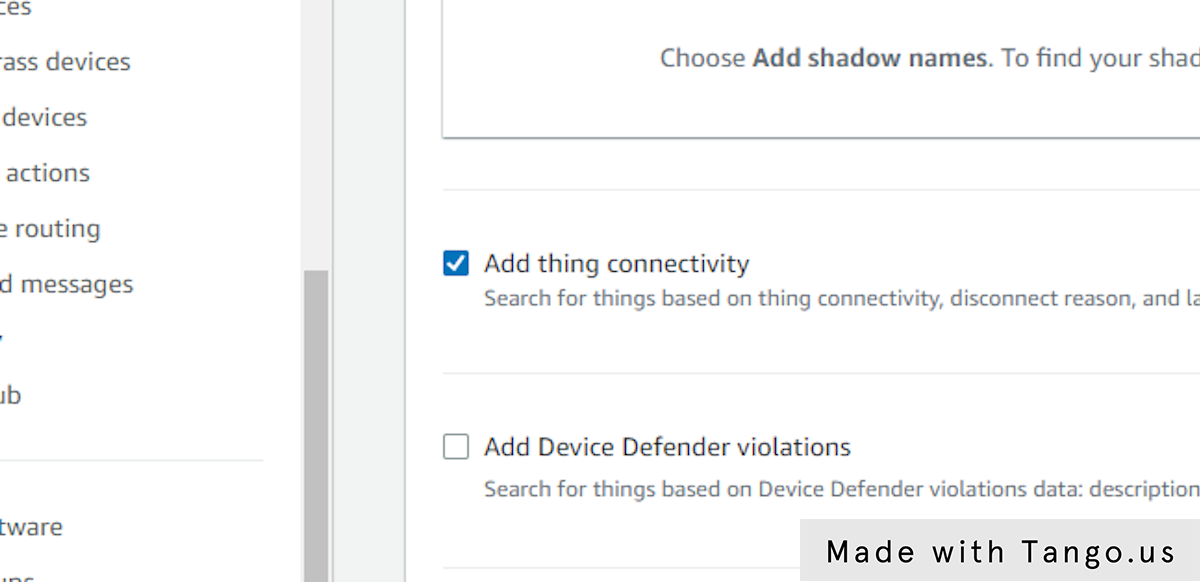
5. Check Add thing connectivity
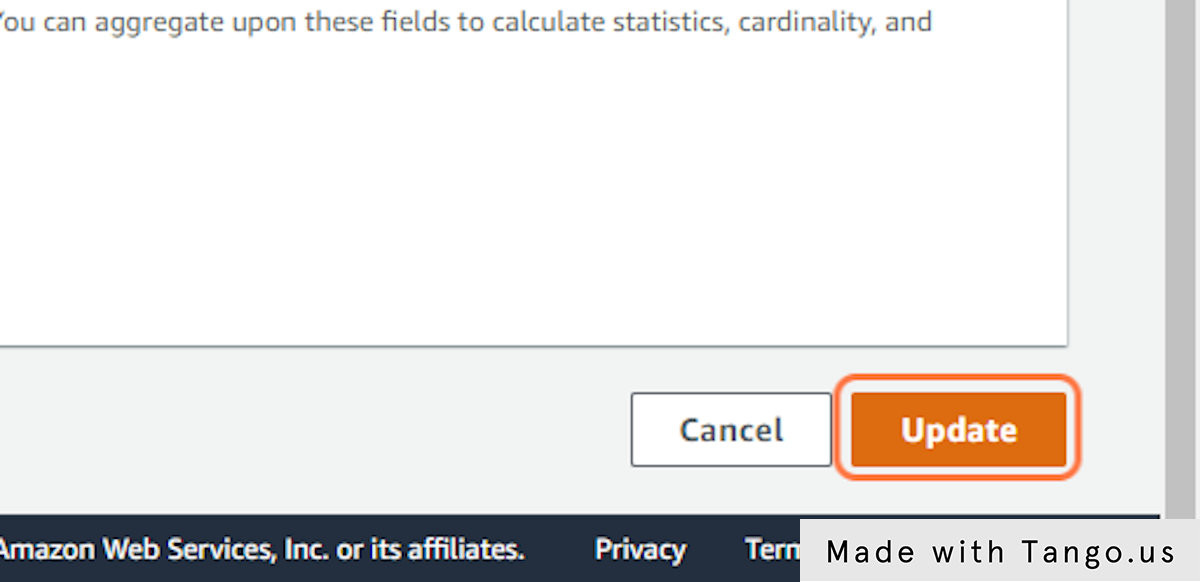
6. Click on Update
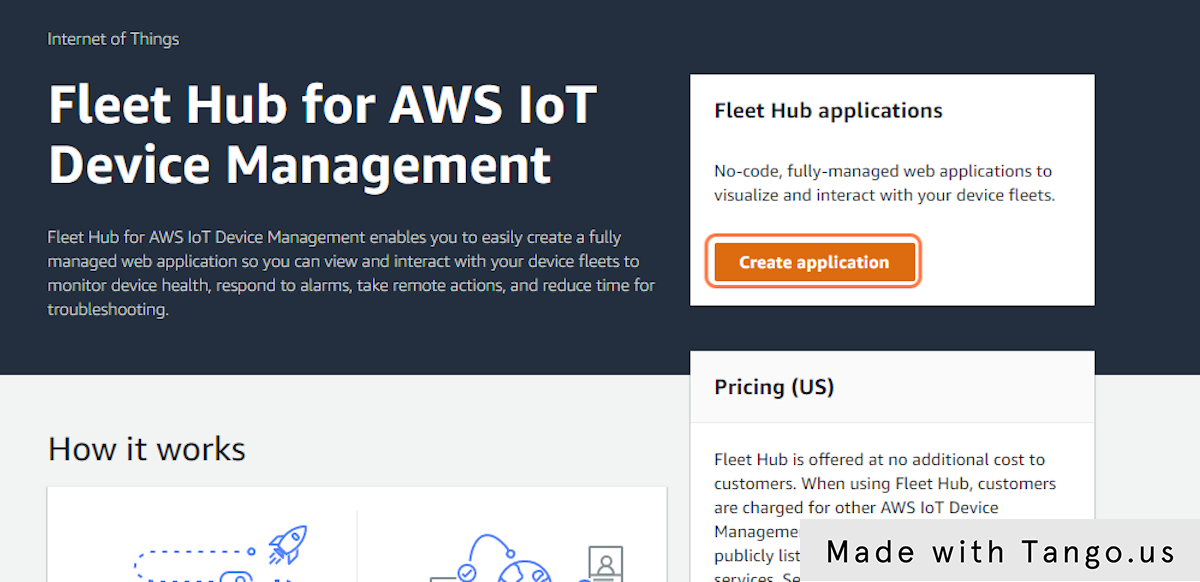
7. Click on Fleet Hub
8. Click on Create application
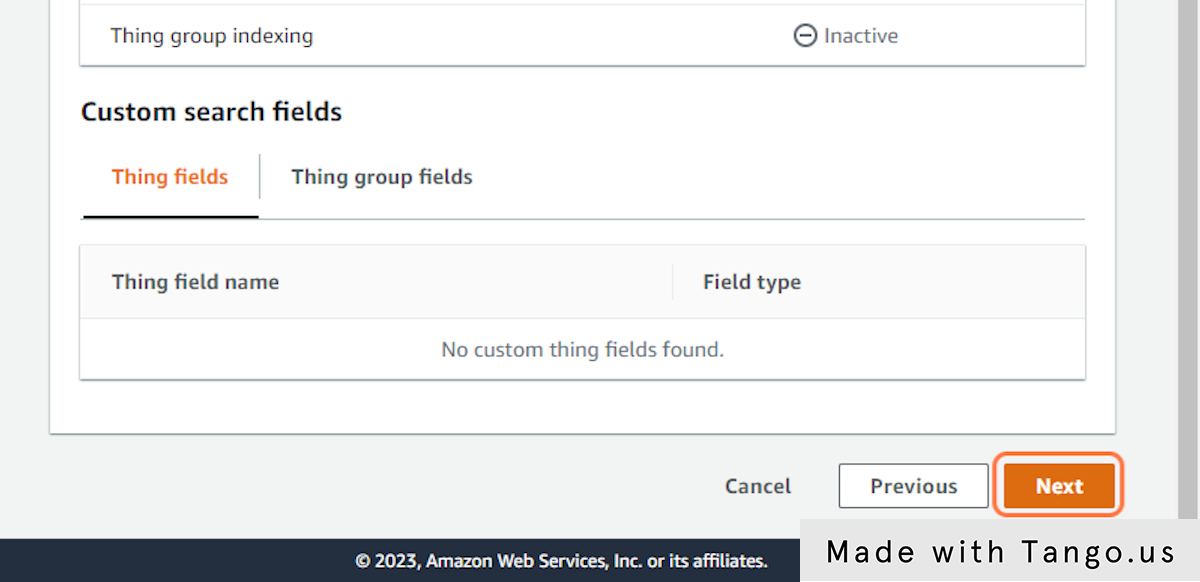
9. Click on Next
10. Type "MeWater Application"
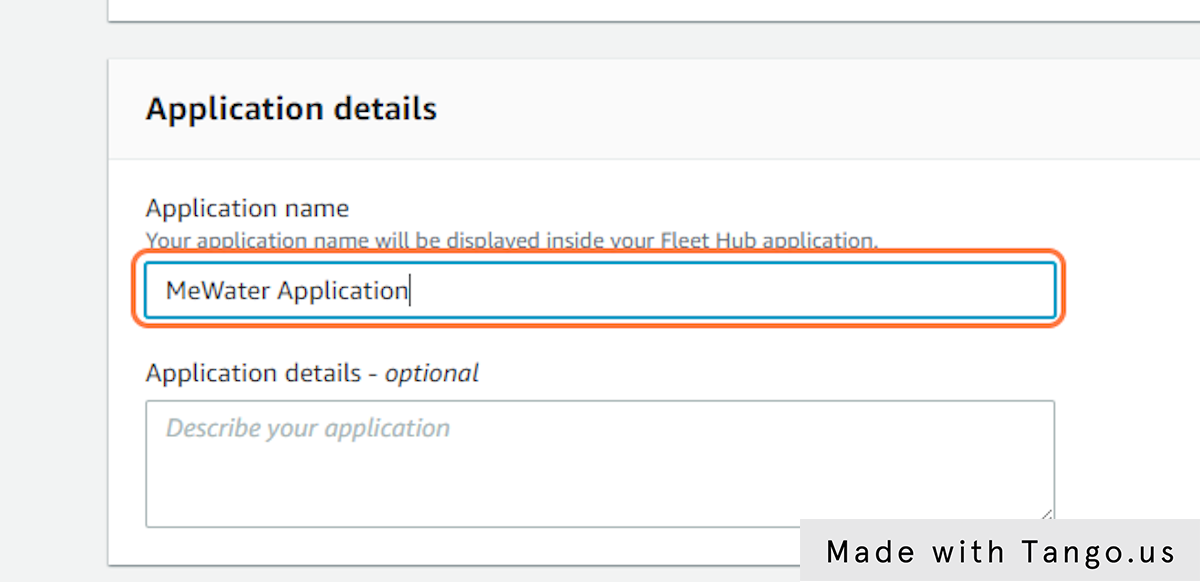
11. Type "Application for monitoring MEWater IoT devices"
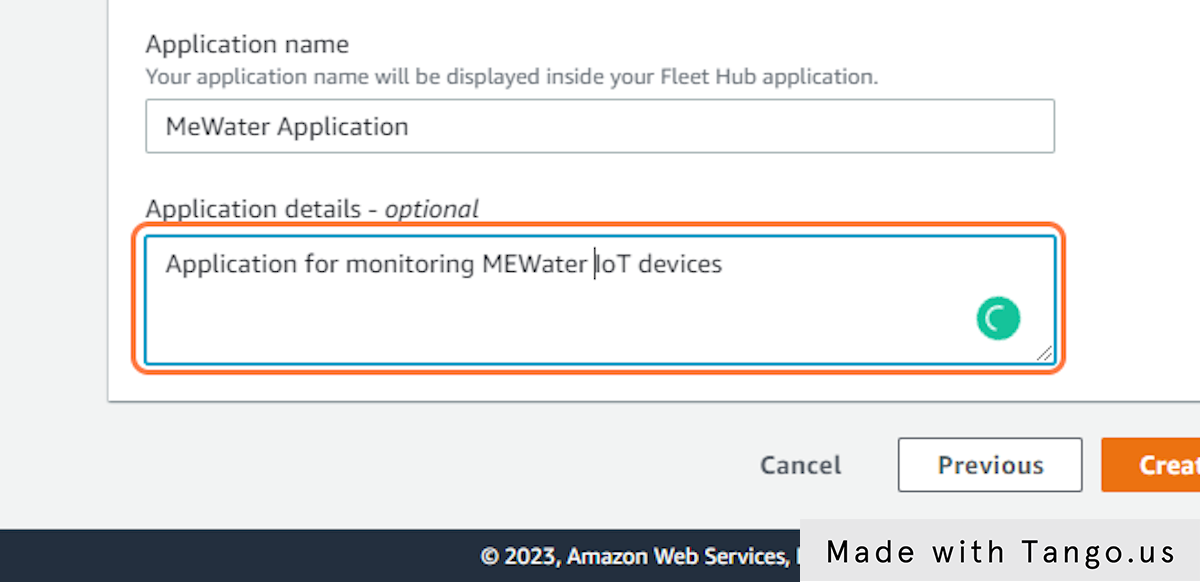
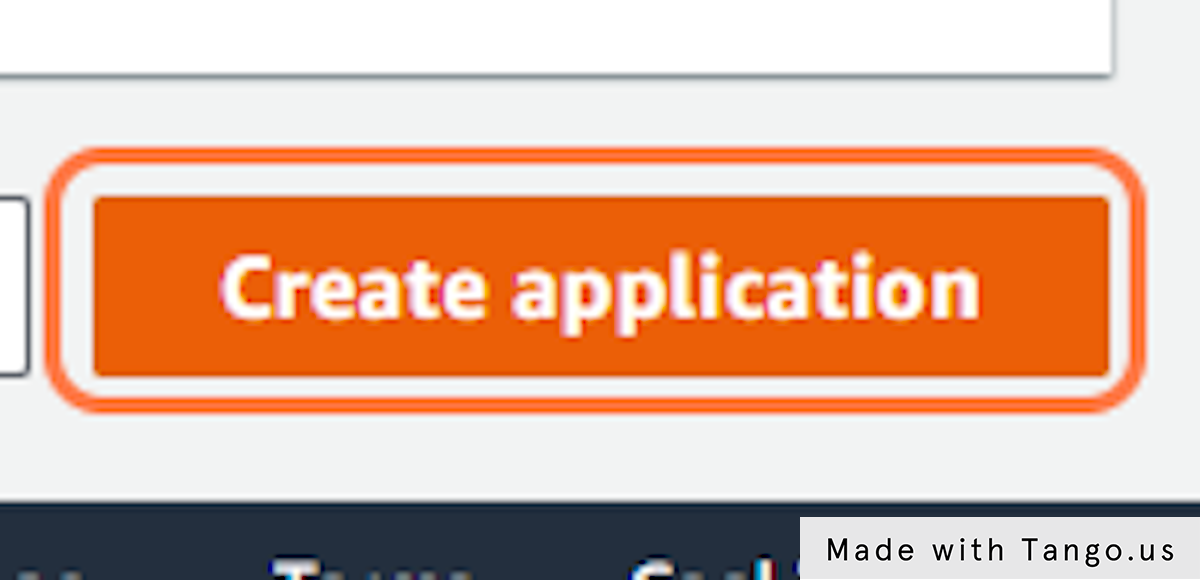
12. Click on Create application
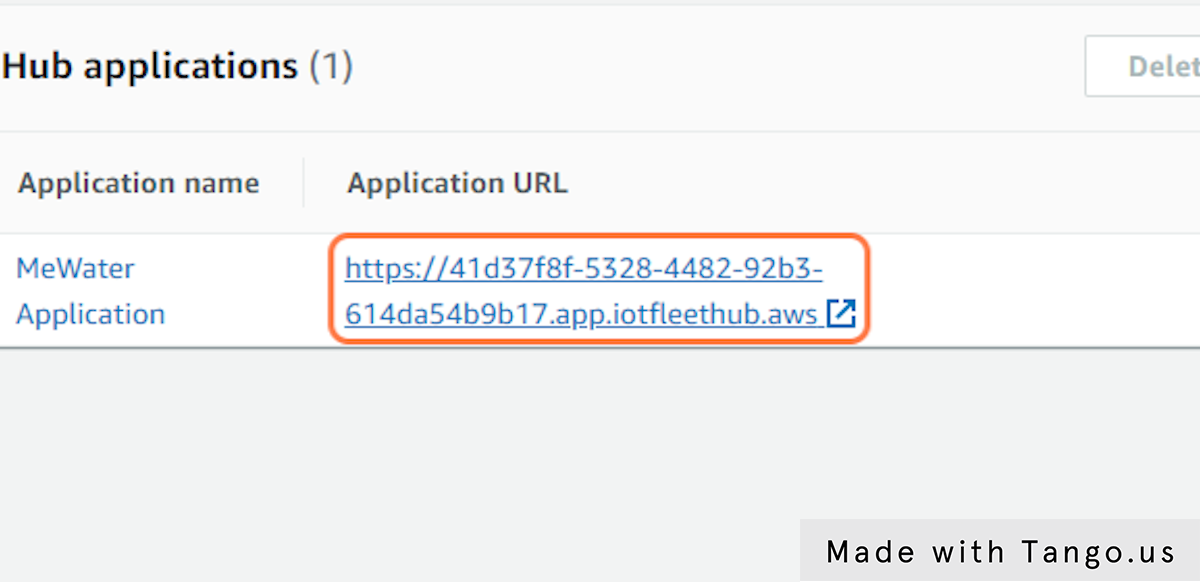
13. Click on https://***************.app.iotfleethub.aws
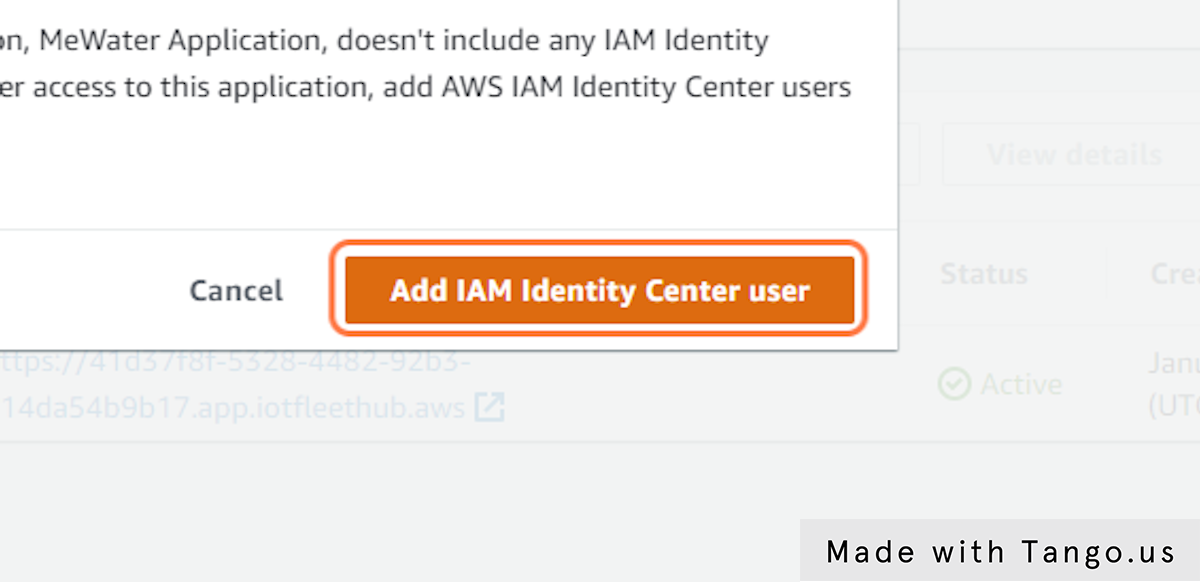
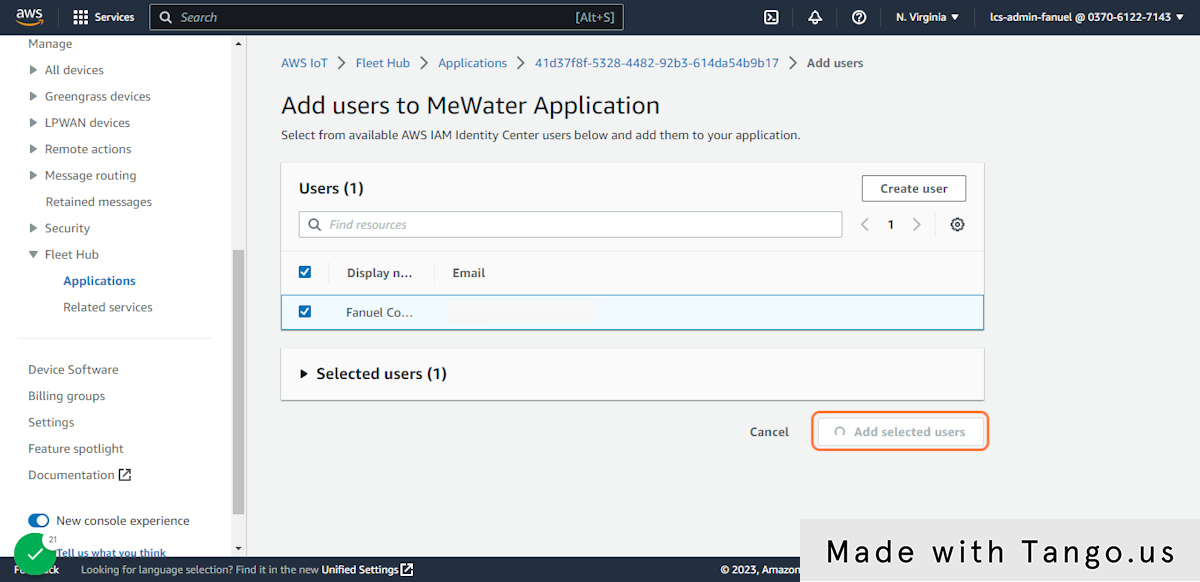
14. Click on Add IAM Identity Center user
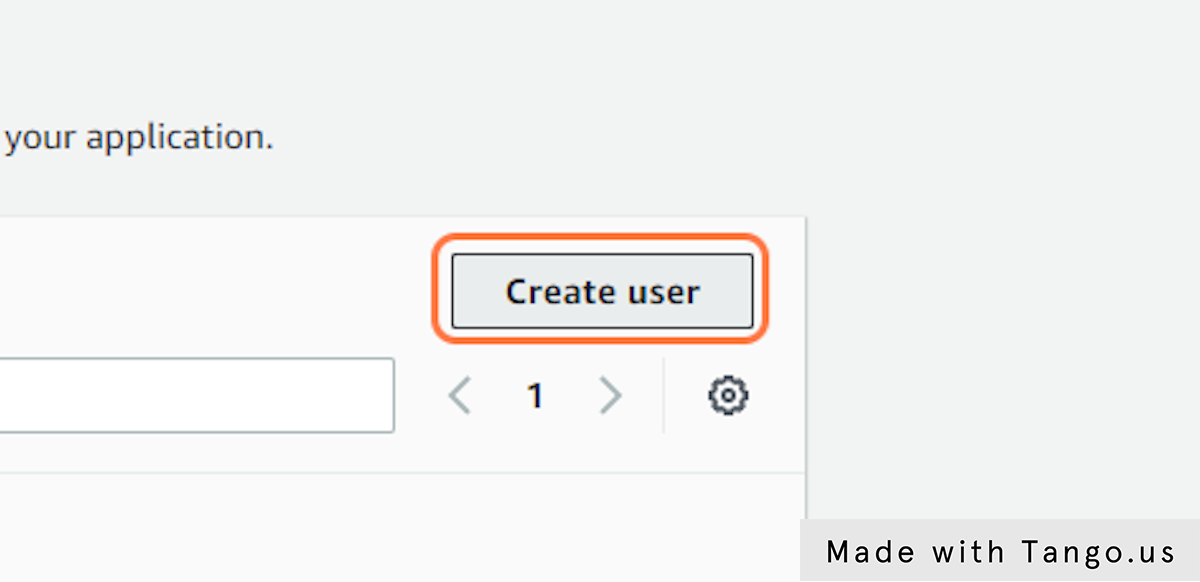
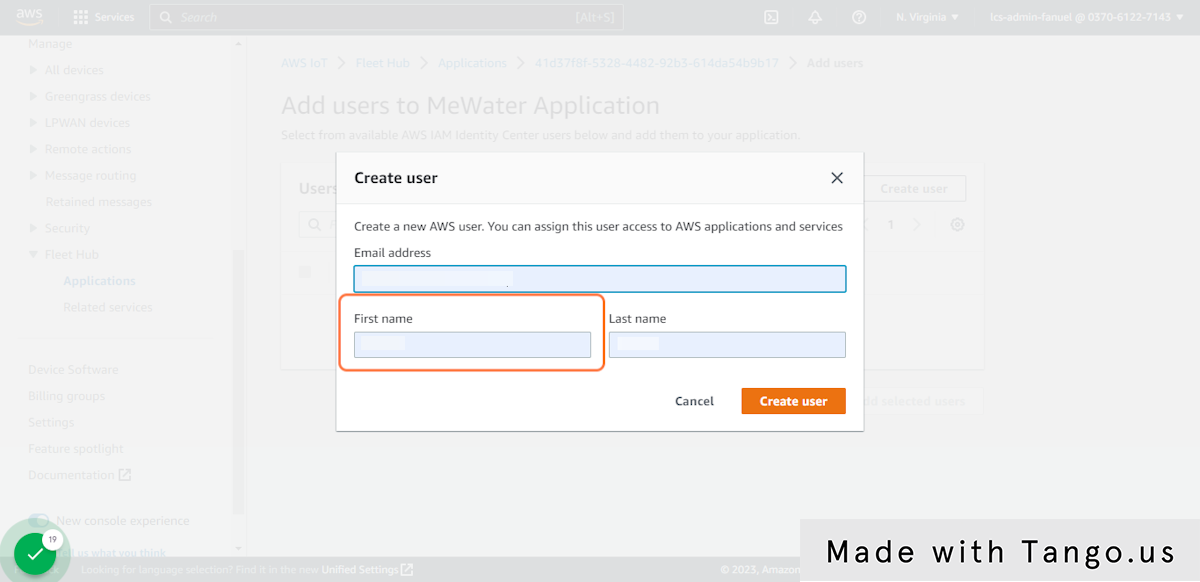
15. Click on Create user
16. Type "[email@email.com]"
17. Type "[First Name]"
18. Type "[Last Name]"
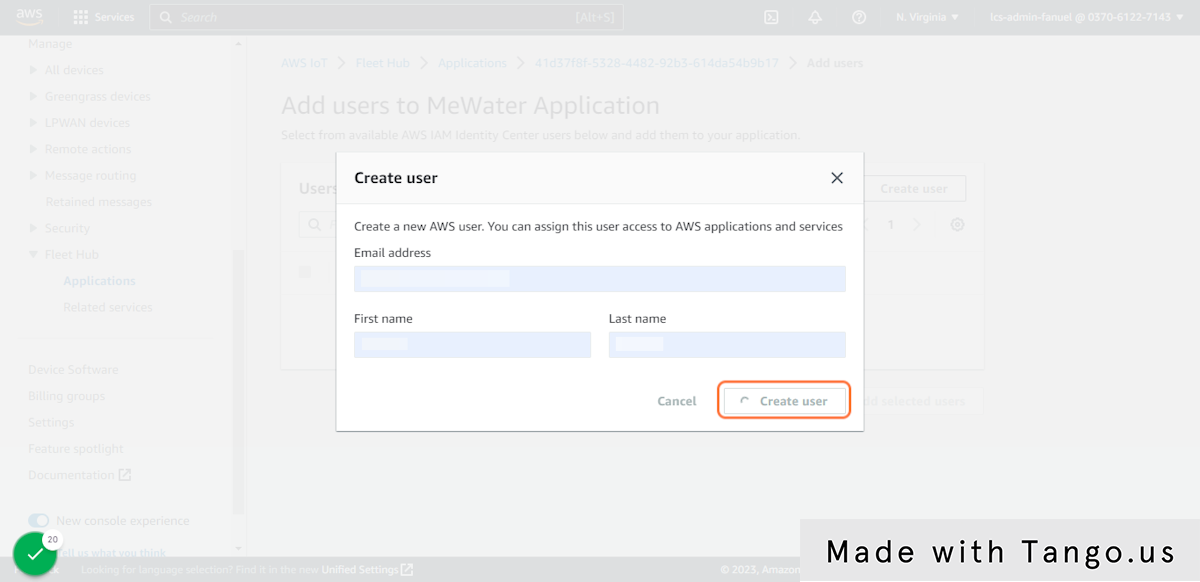
19. Click on Create user
20. Check table
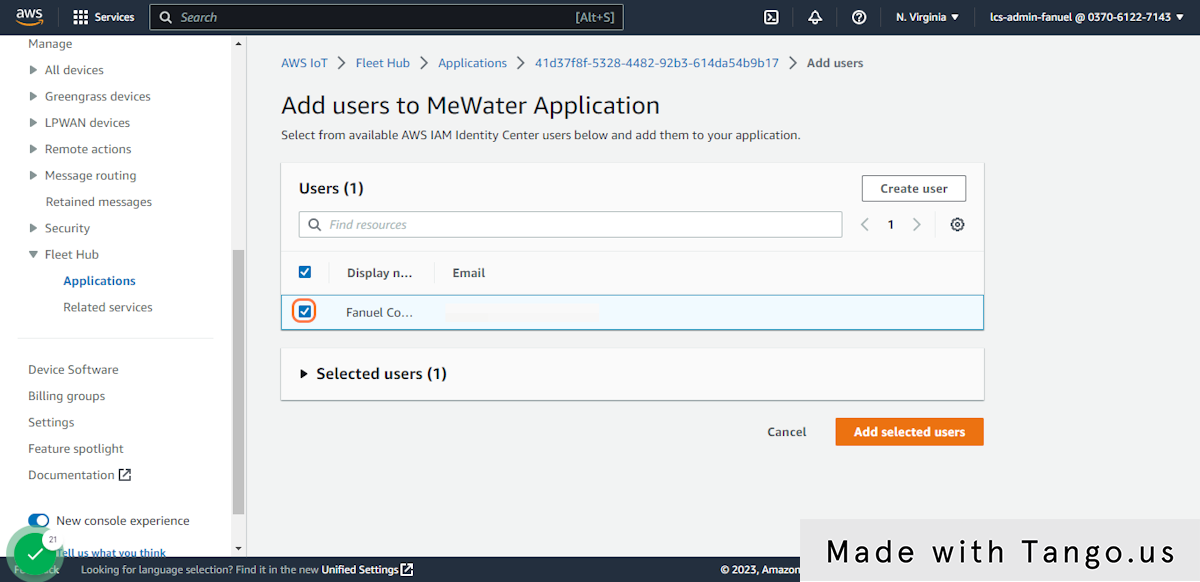
21. Click on Add selected users
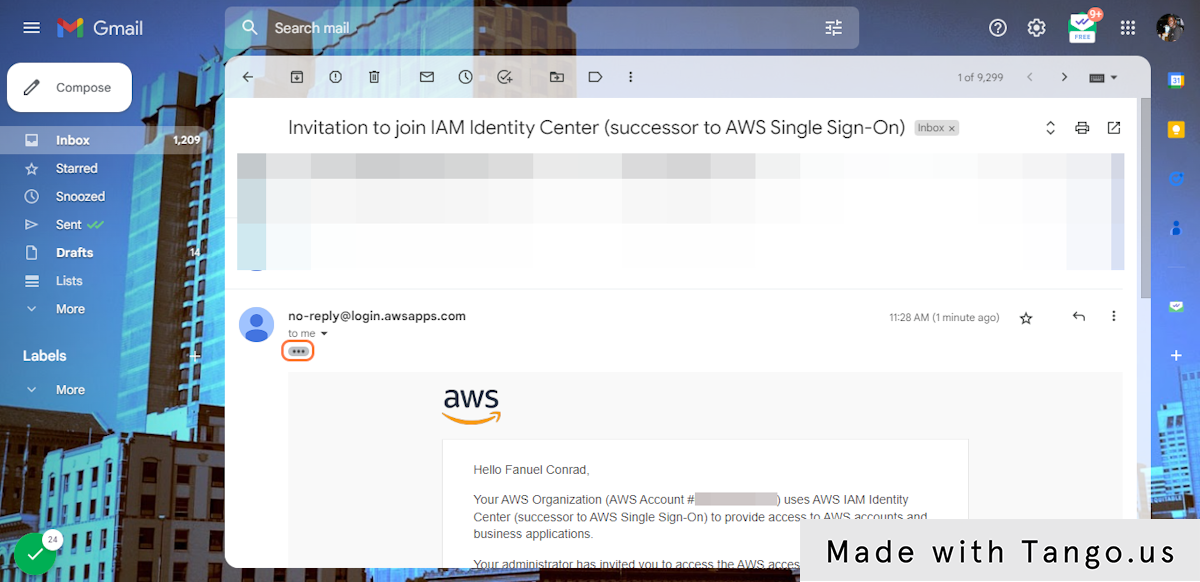
23. Click on Invitation to join IAM Identity Center (successor to AWS Single Sign-On)

24. Click on image
25. Go to Amazon Web Services (AWS)
26. Type password
27. Type password
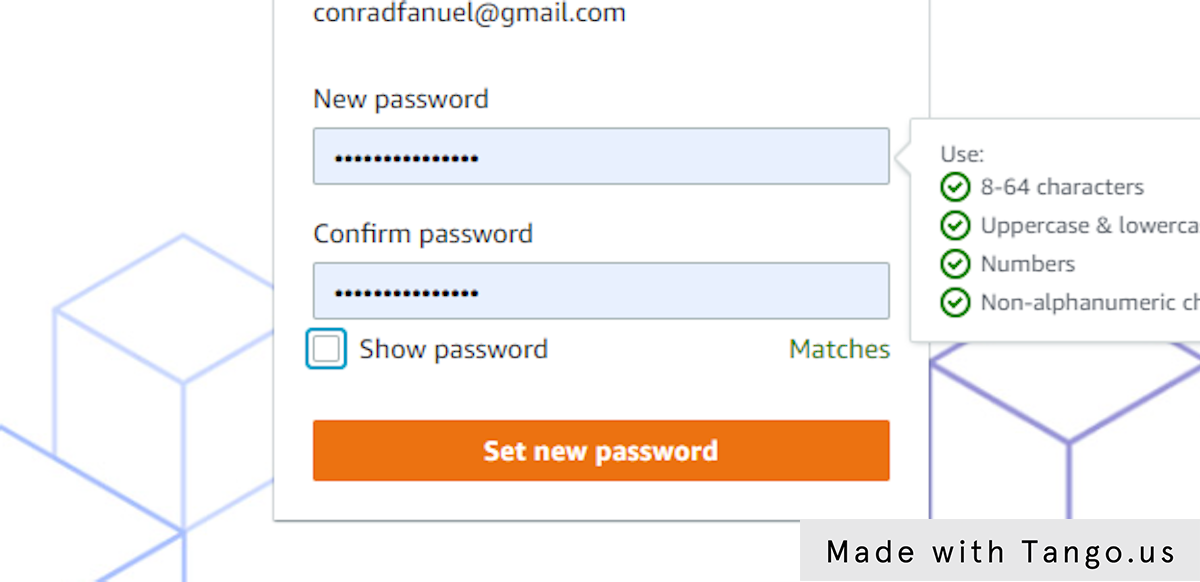
28. Click on Set new password
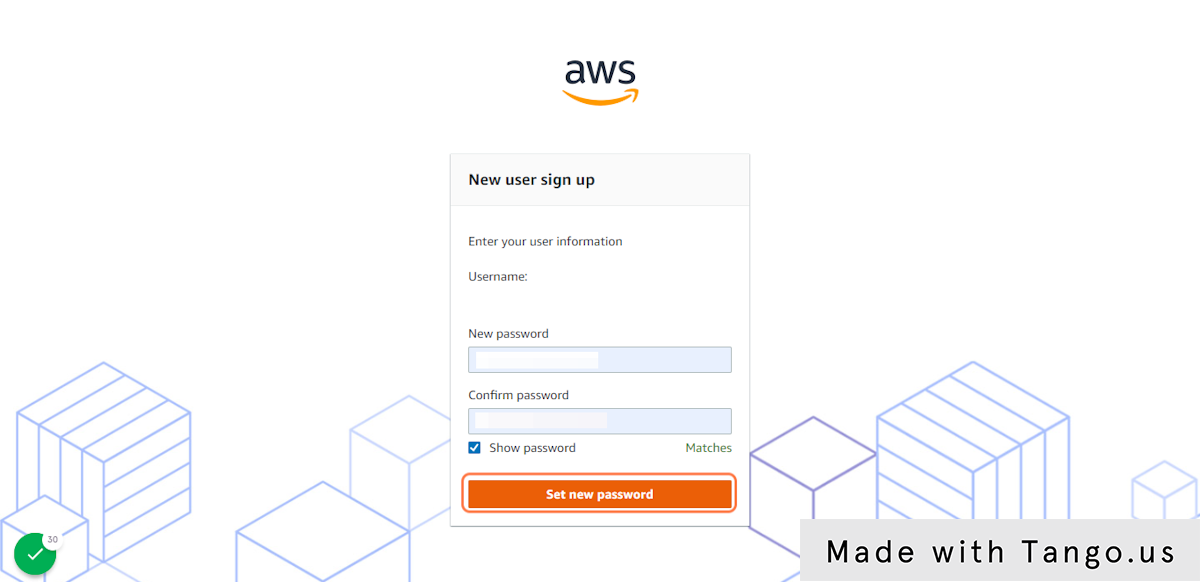
29. Go to Amazon Web Services (AWS)
30. Type password
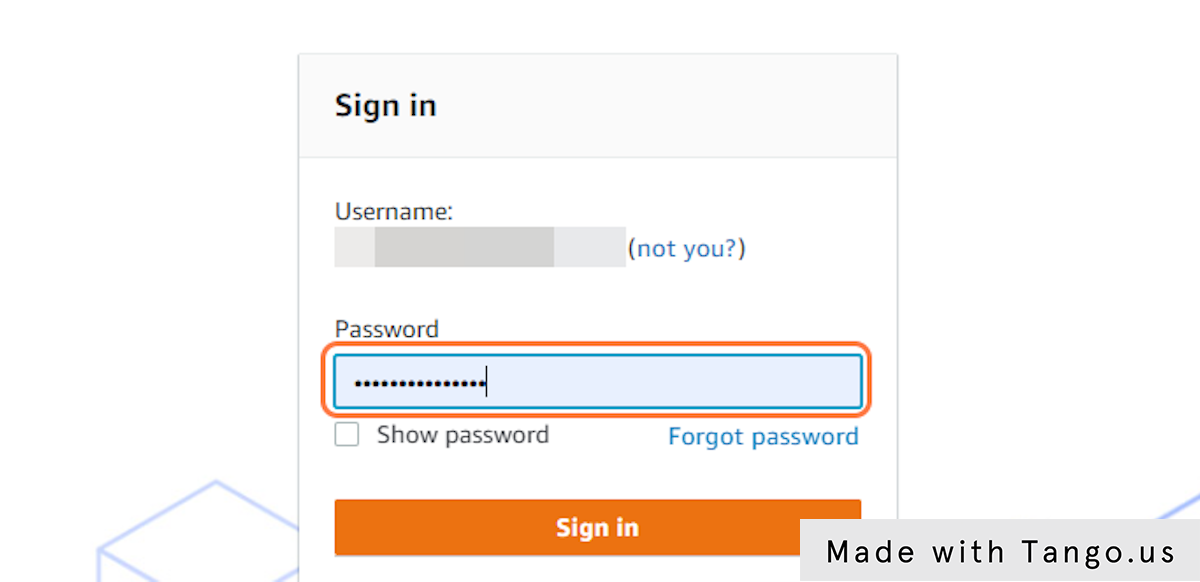
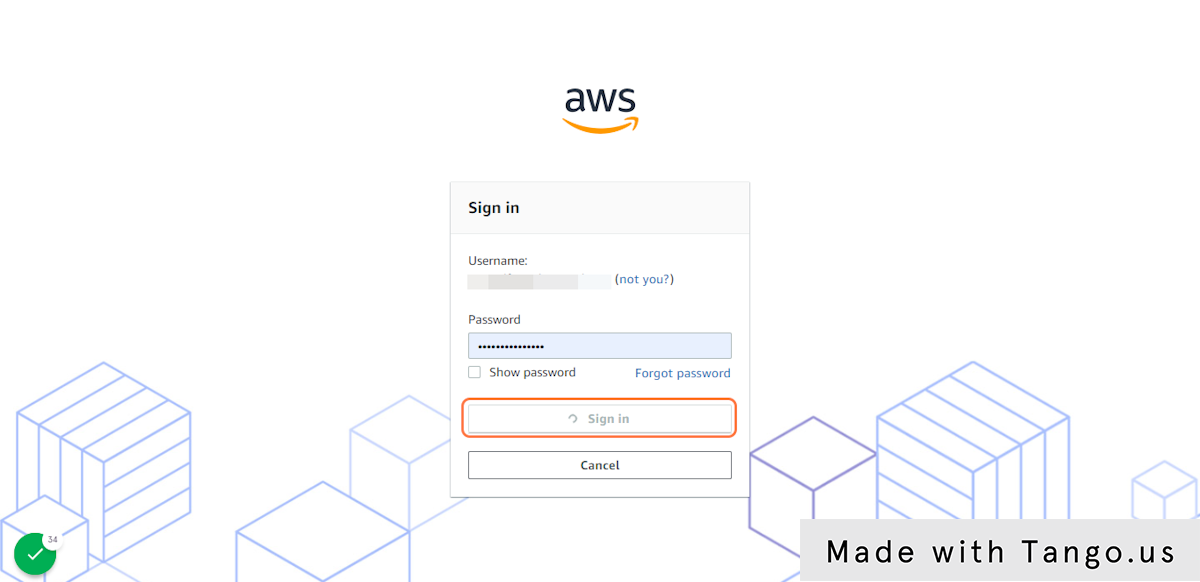
31. Click on Sign in
32. Go to Amazon Web Services (AWS)
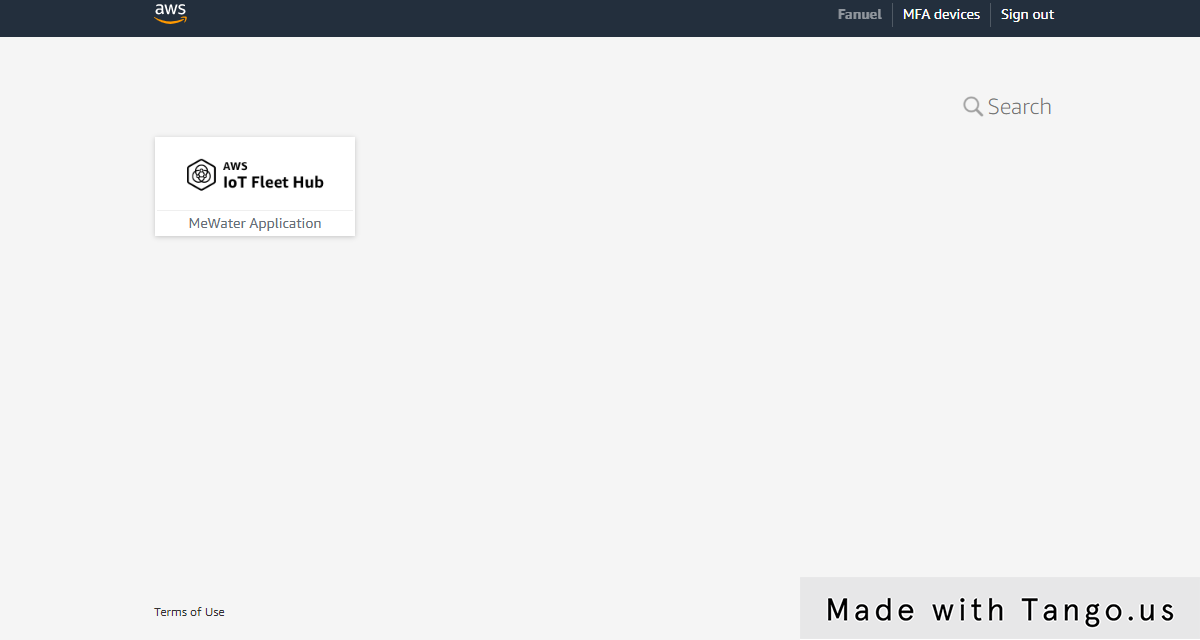
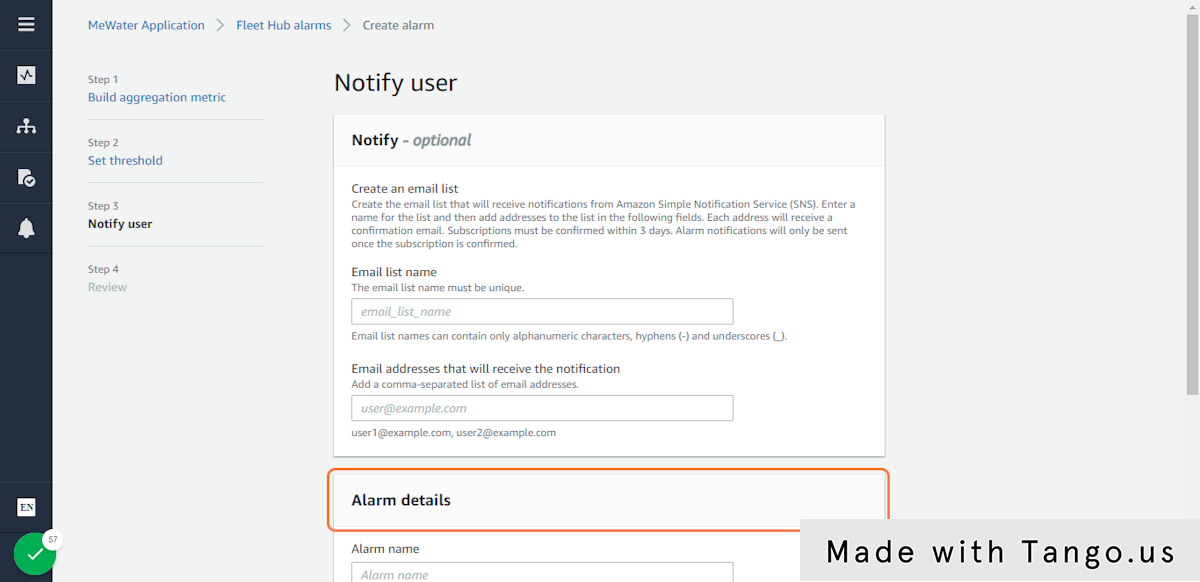
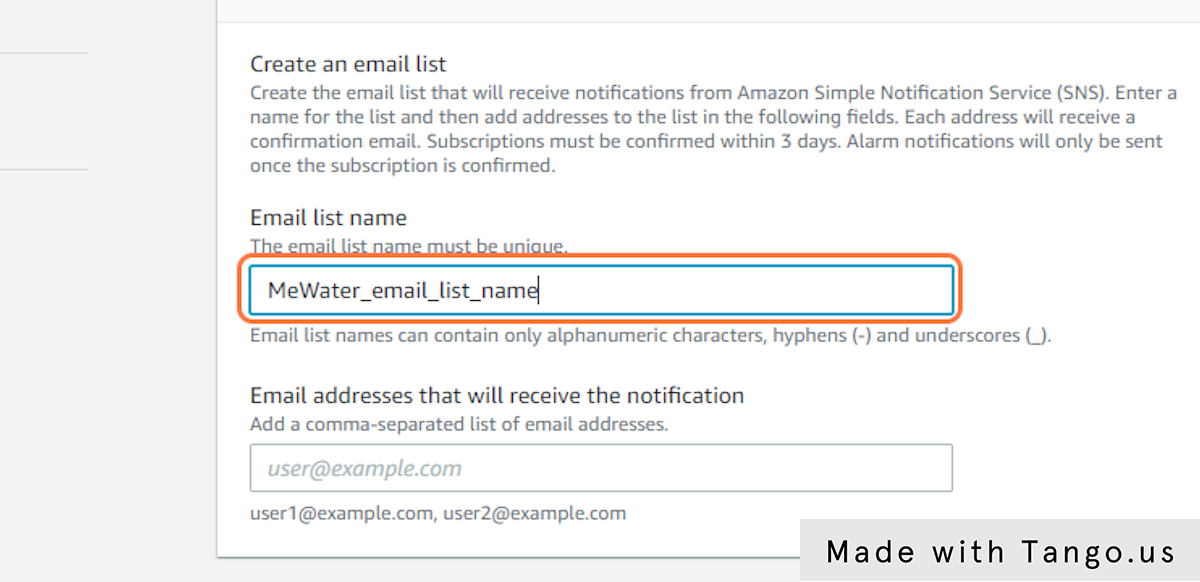
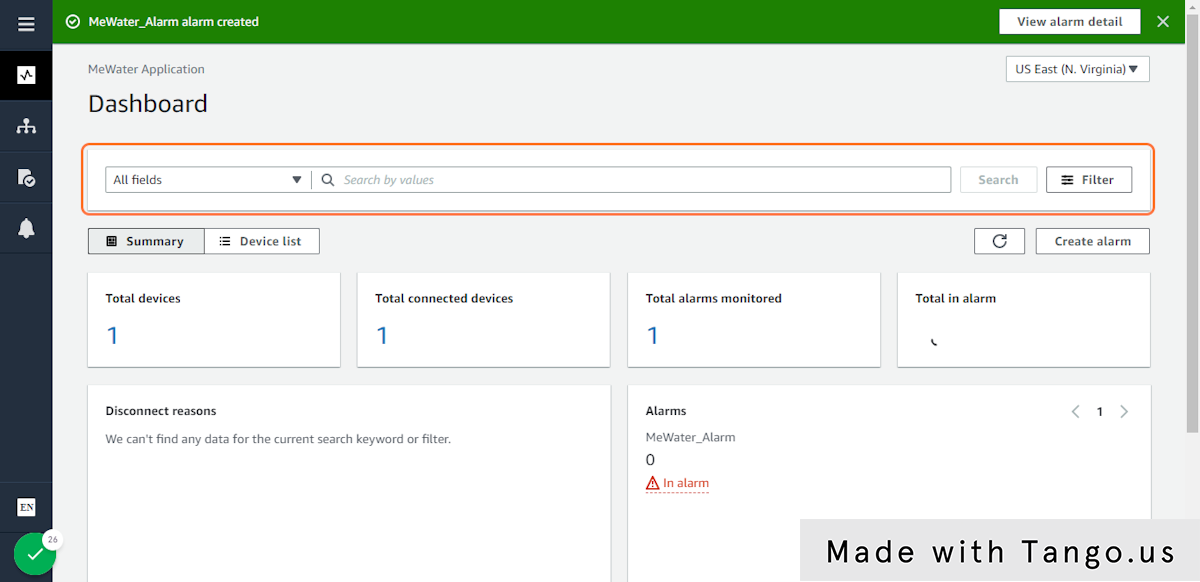
33. Click on MeWater Application
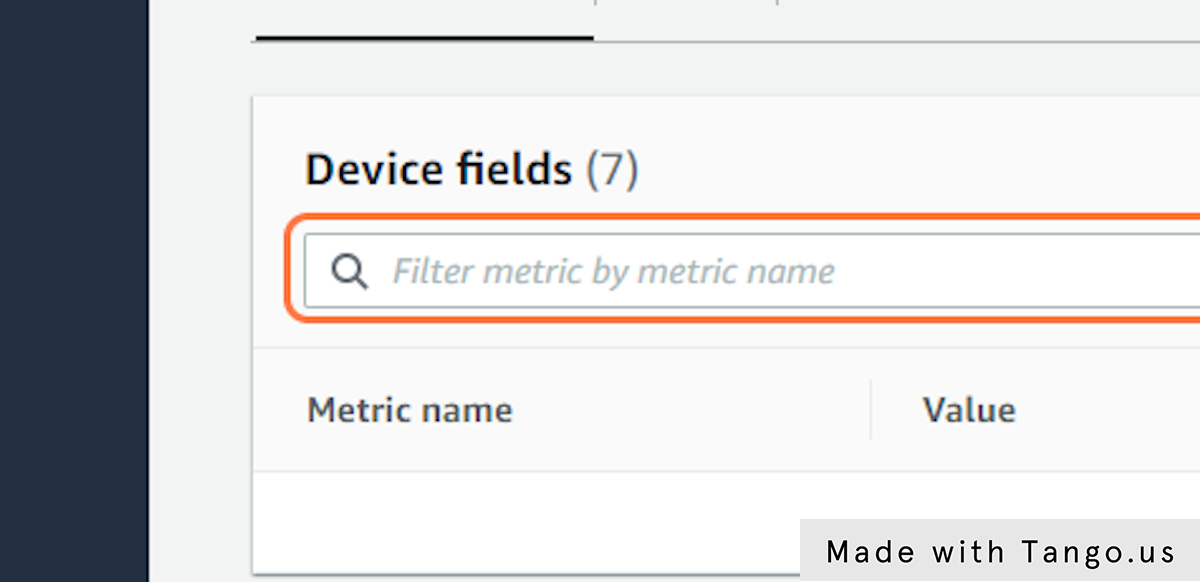
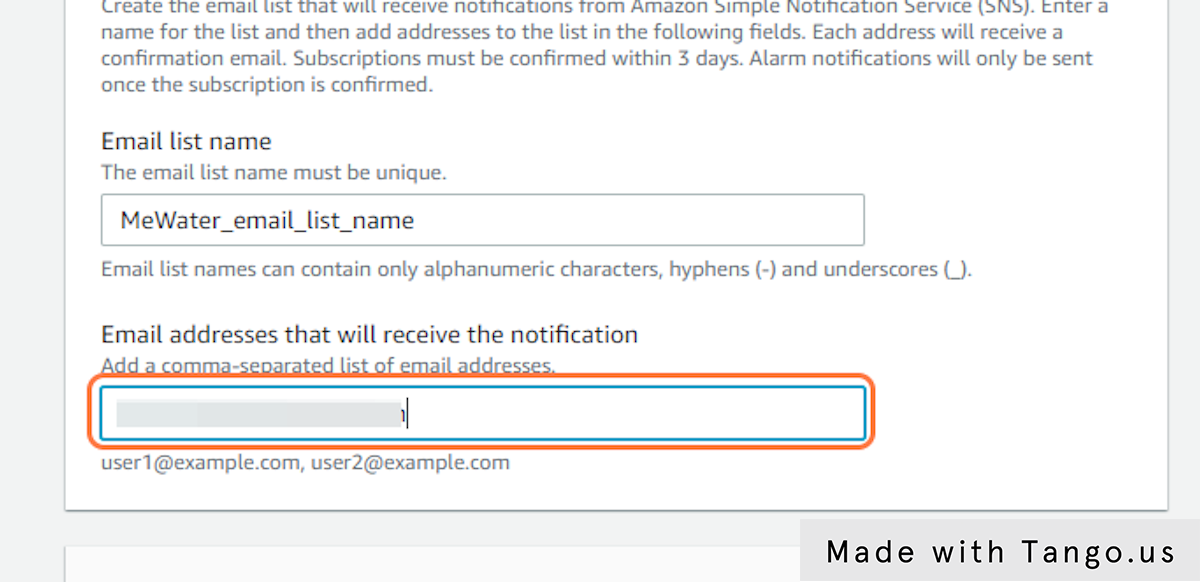
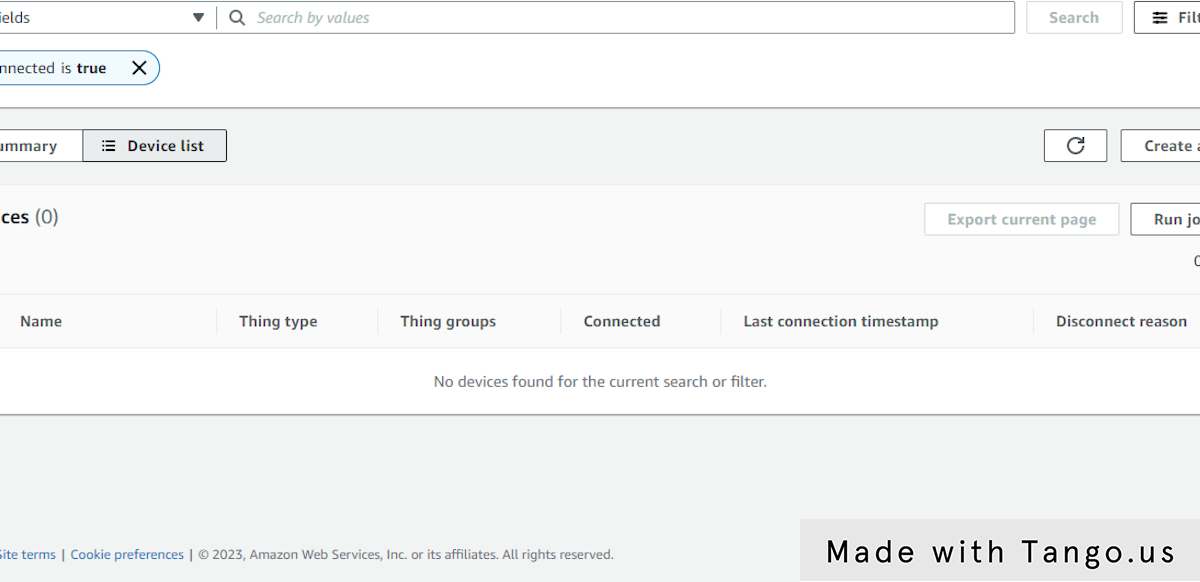
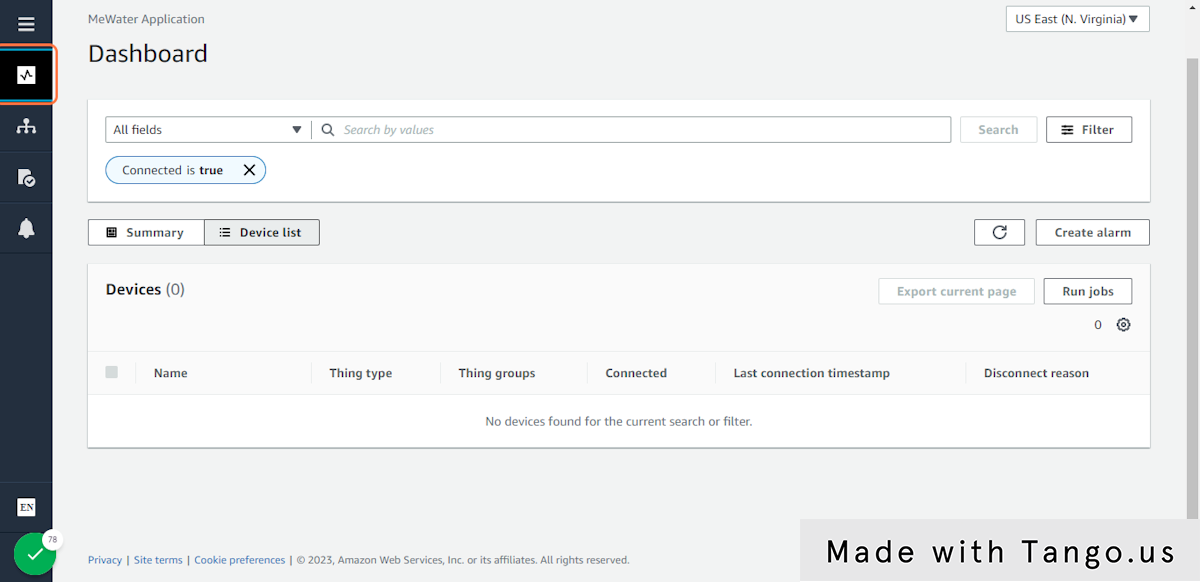
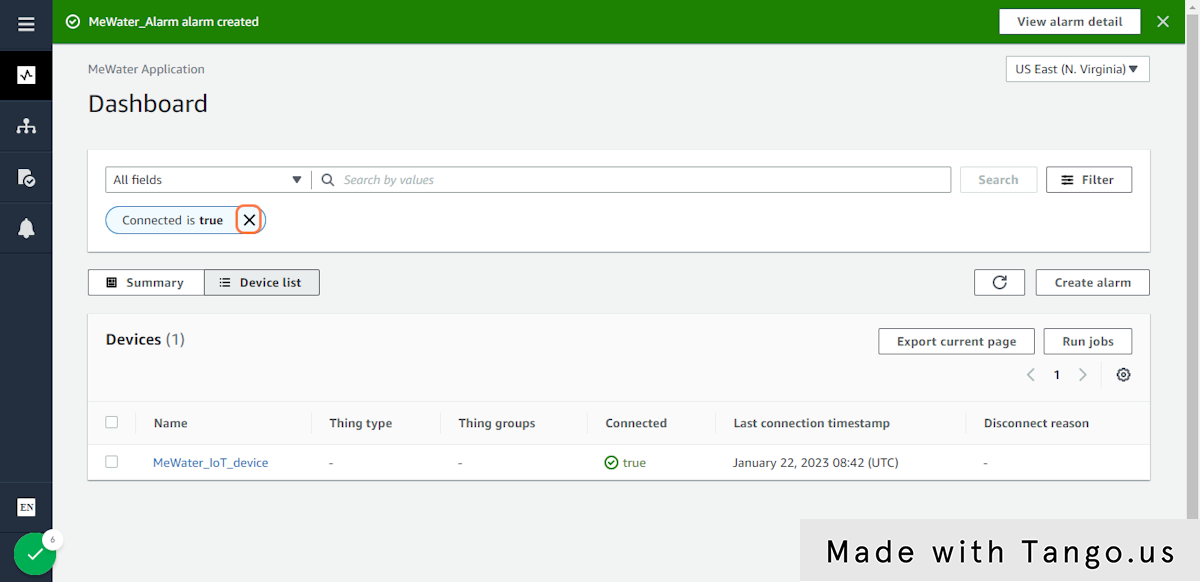
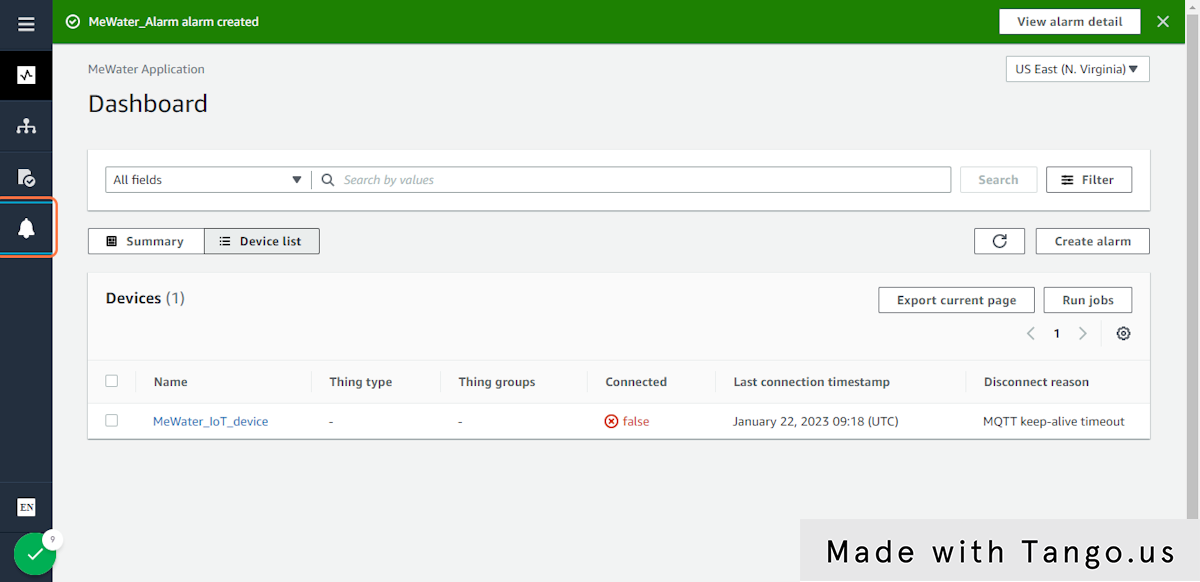
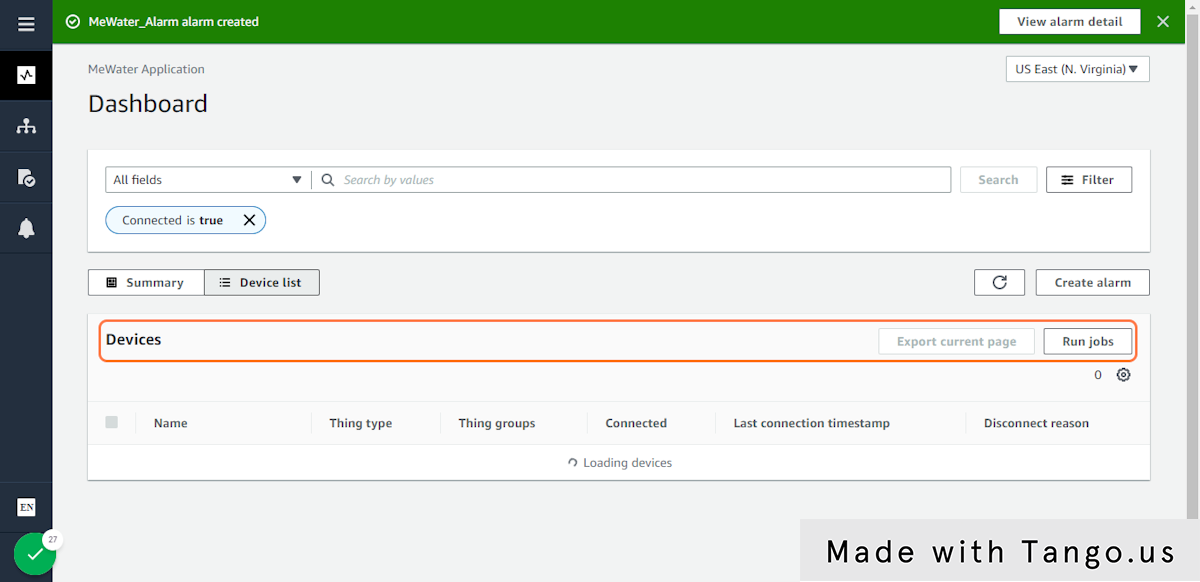
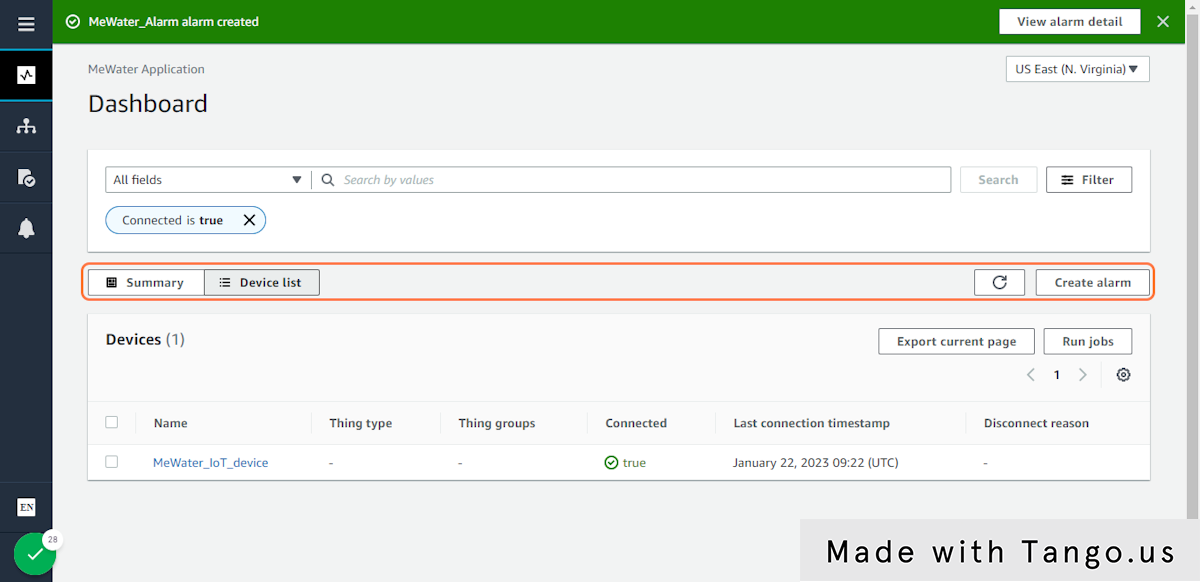
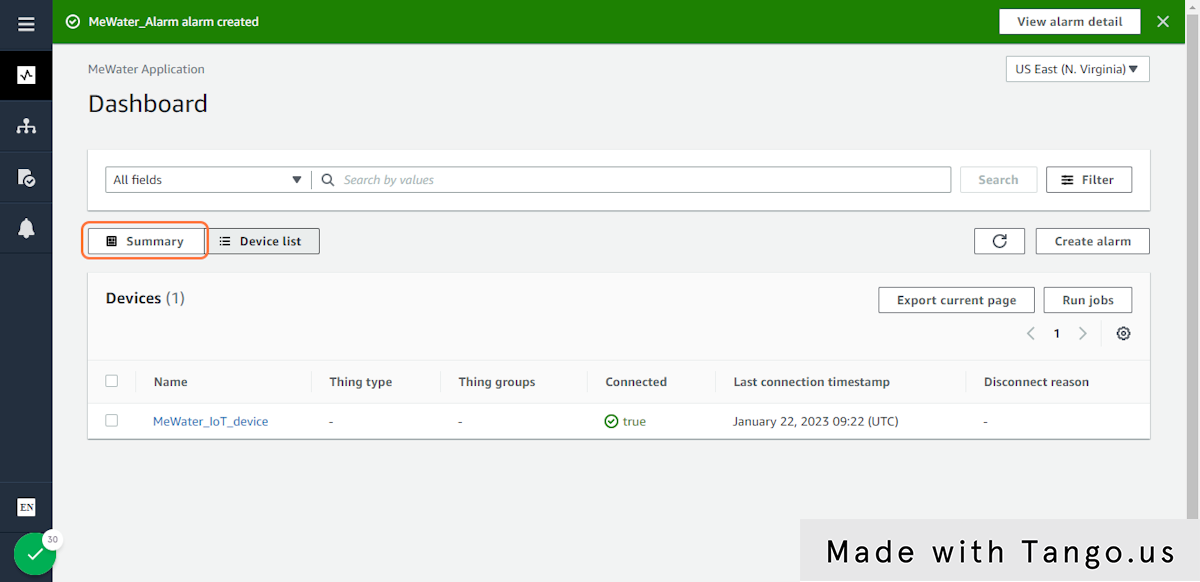
35. Click on Device list

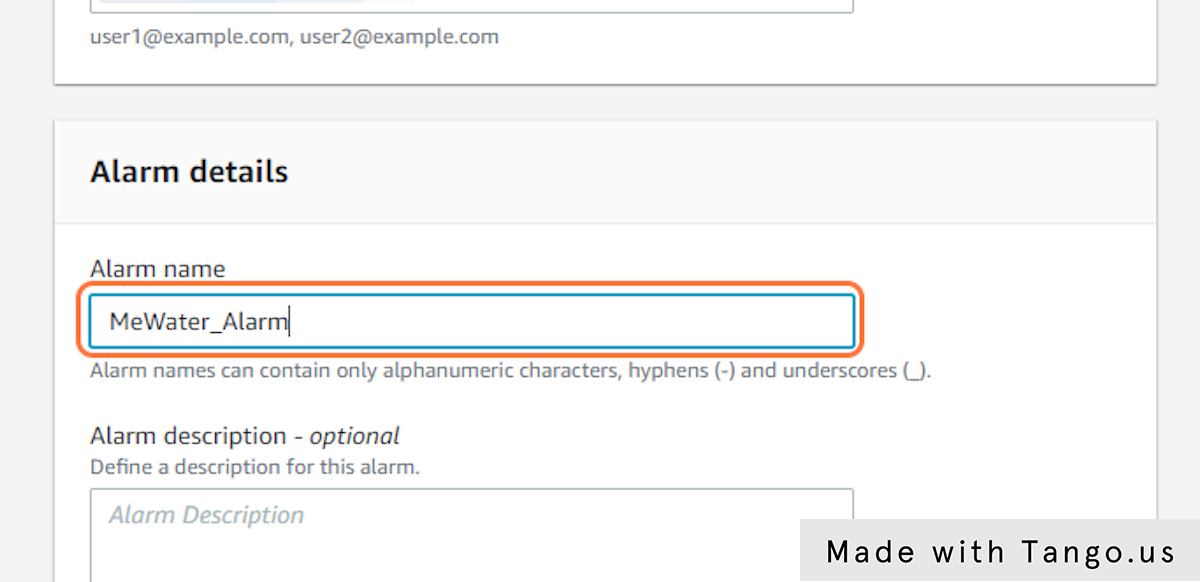
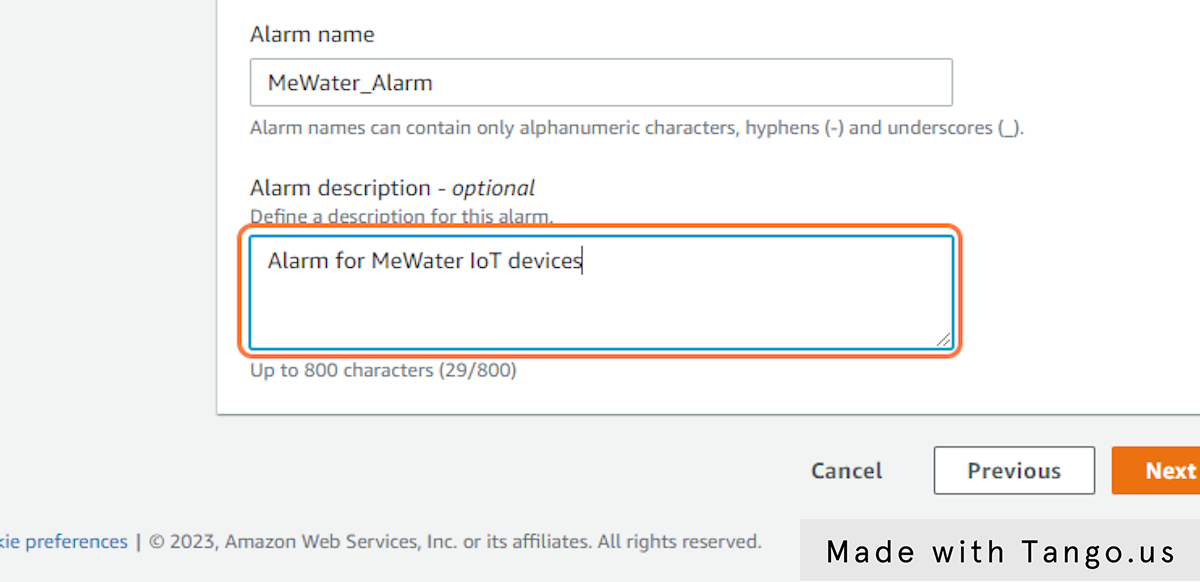
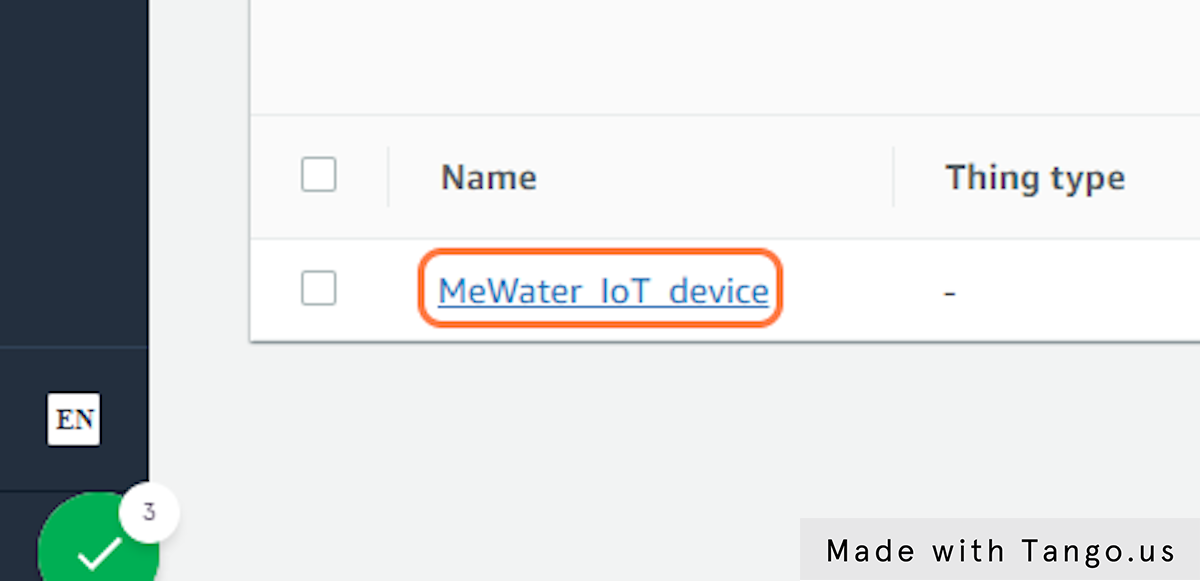
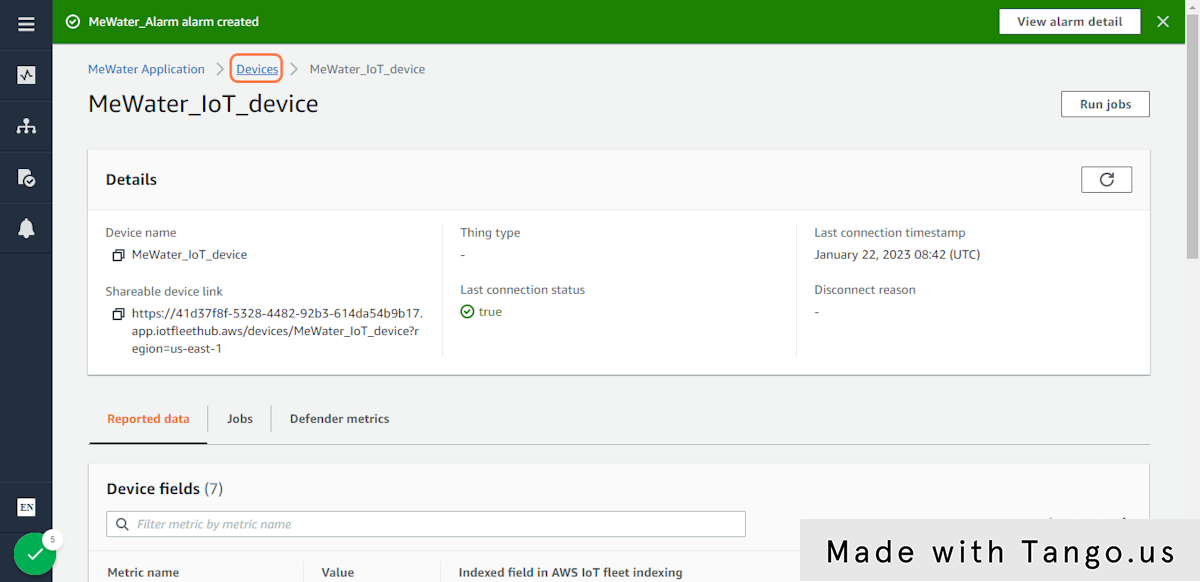
36. Click on MeWater_IoT_device
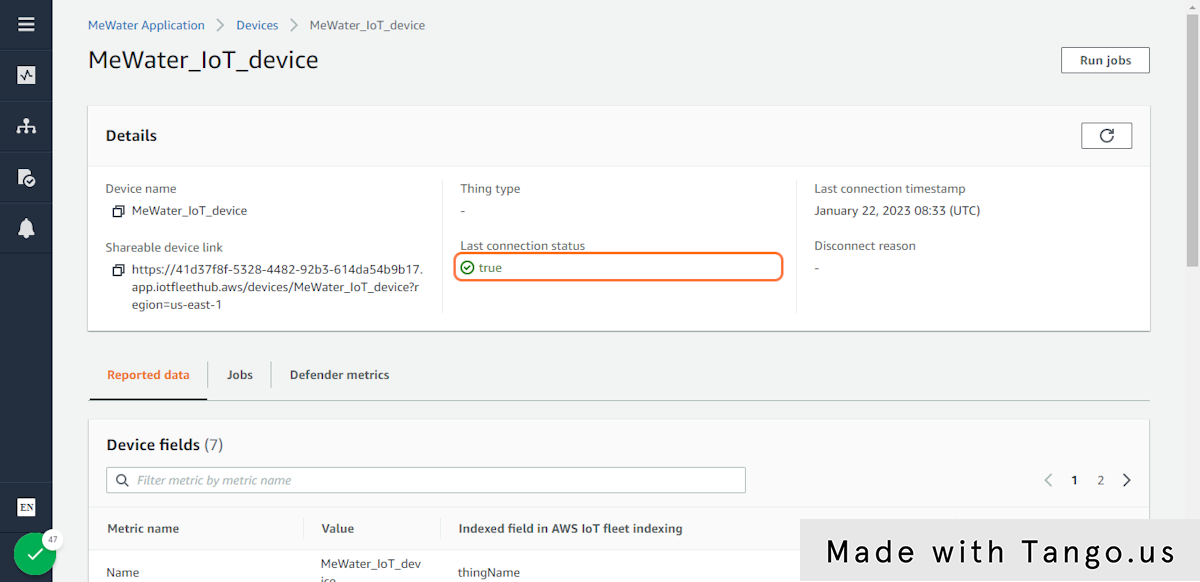
37. Click on image
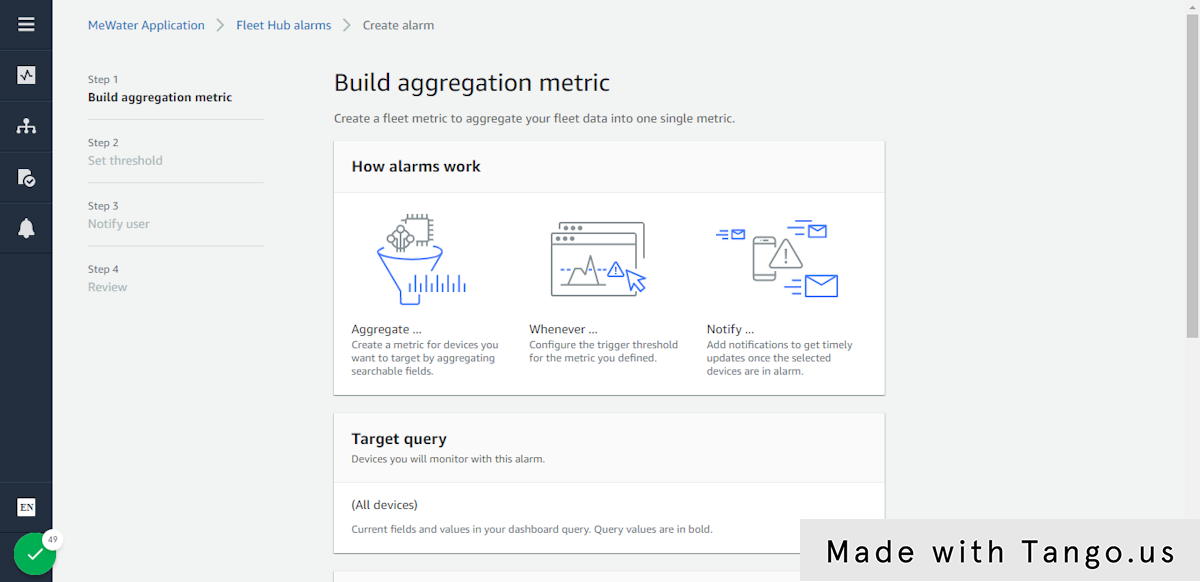
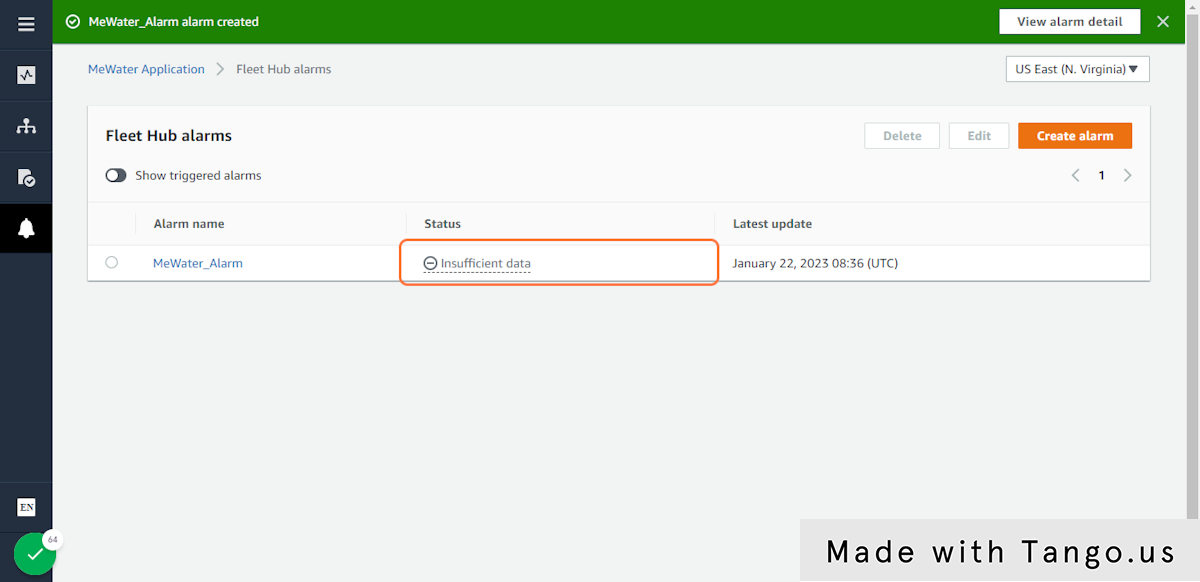
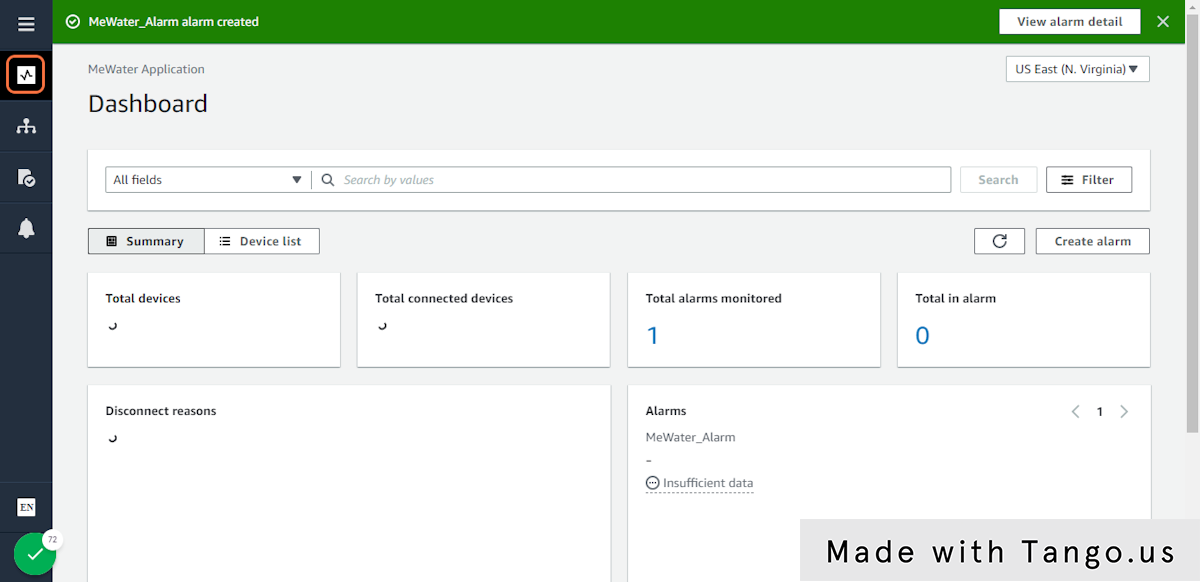
38. Click on Create alarm

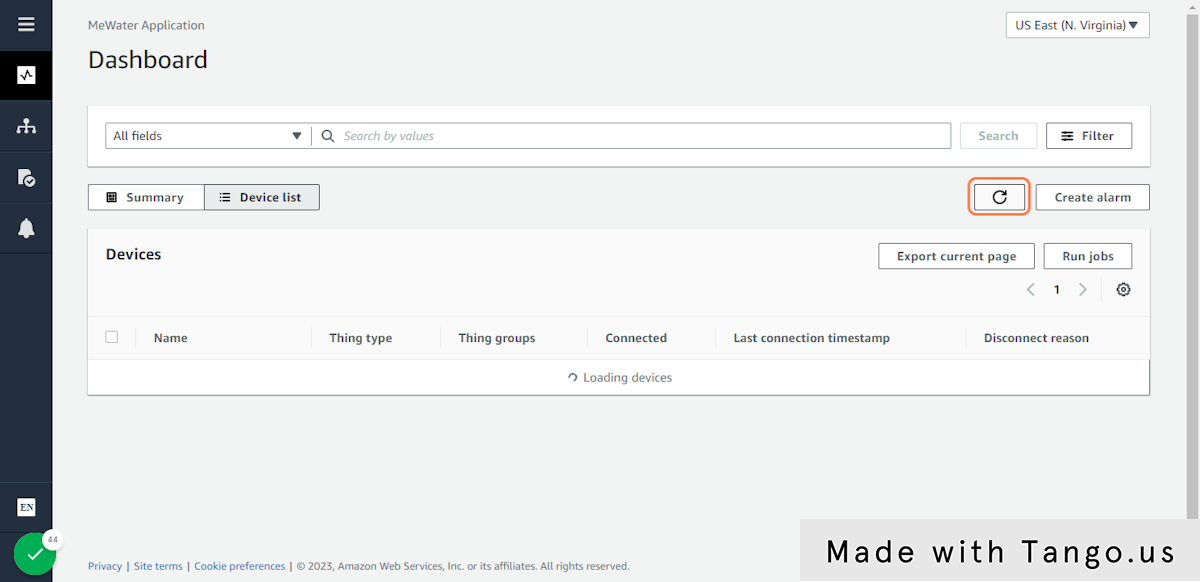
39. Click on Device list

40. Click on highlight
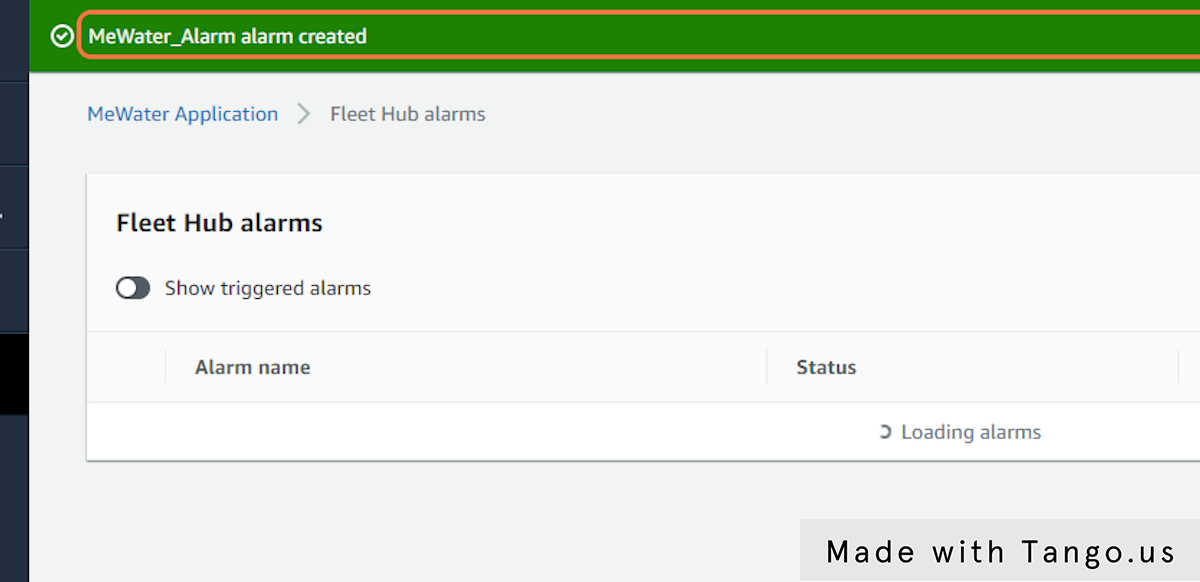
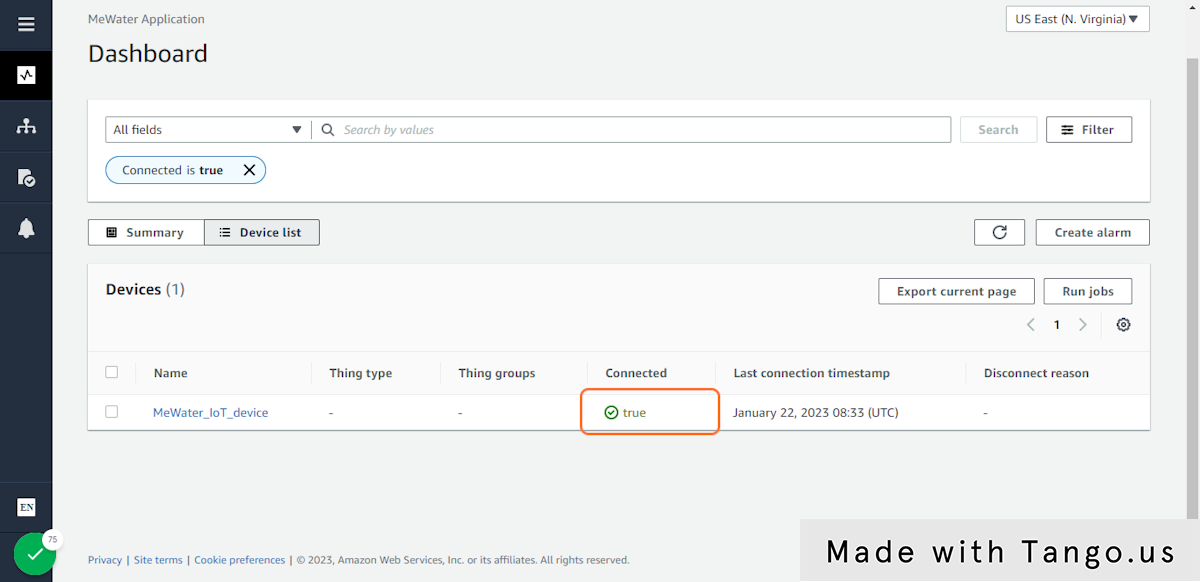
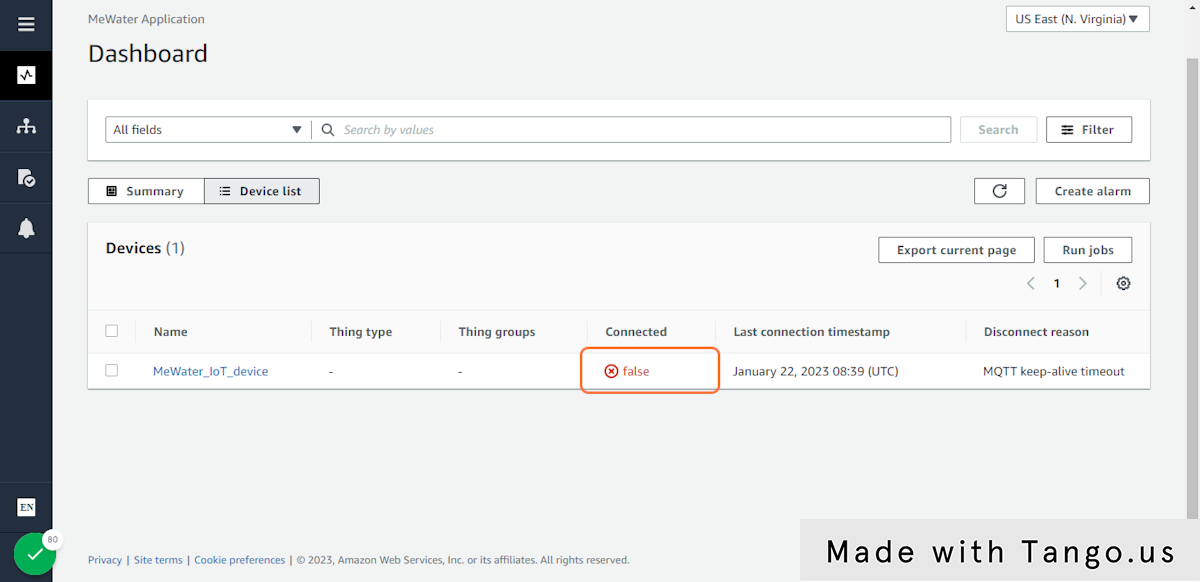
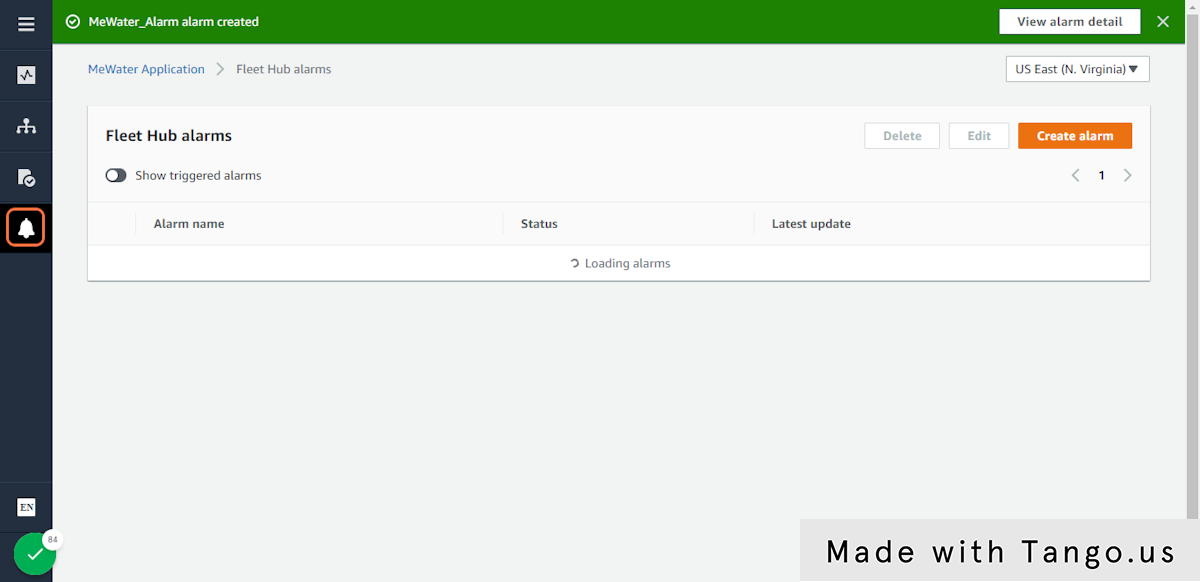
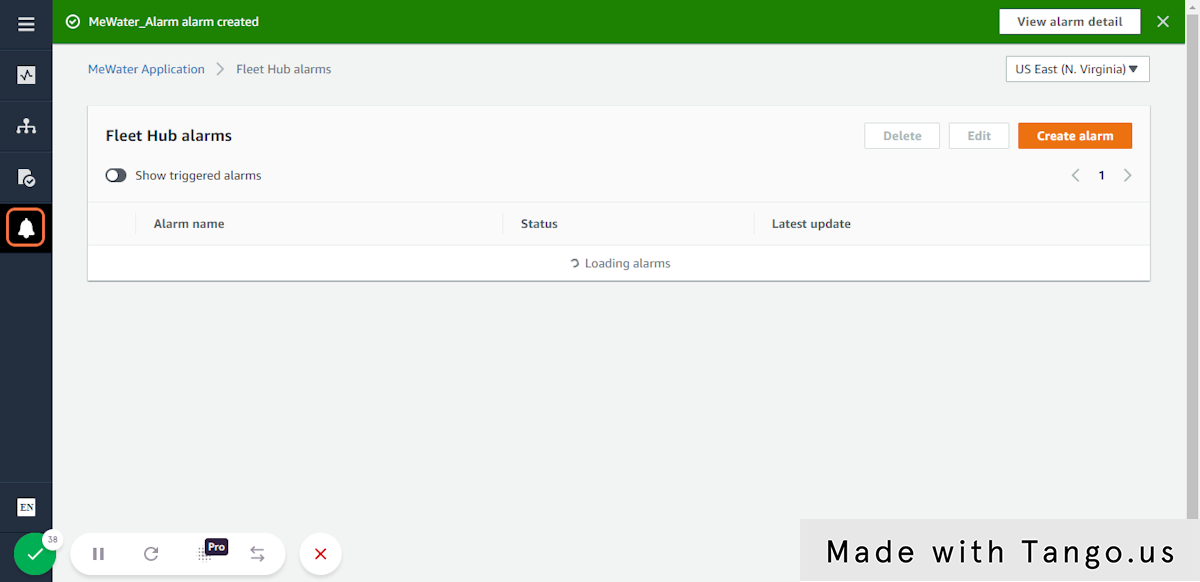
41. Click on MeWater_IoT_device
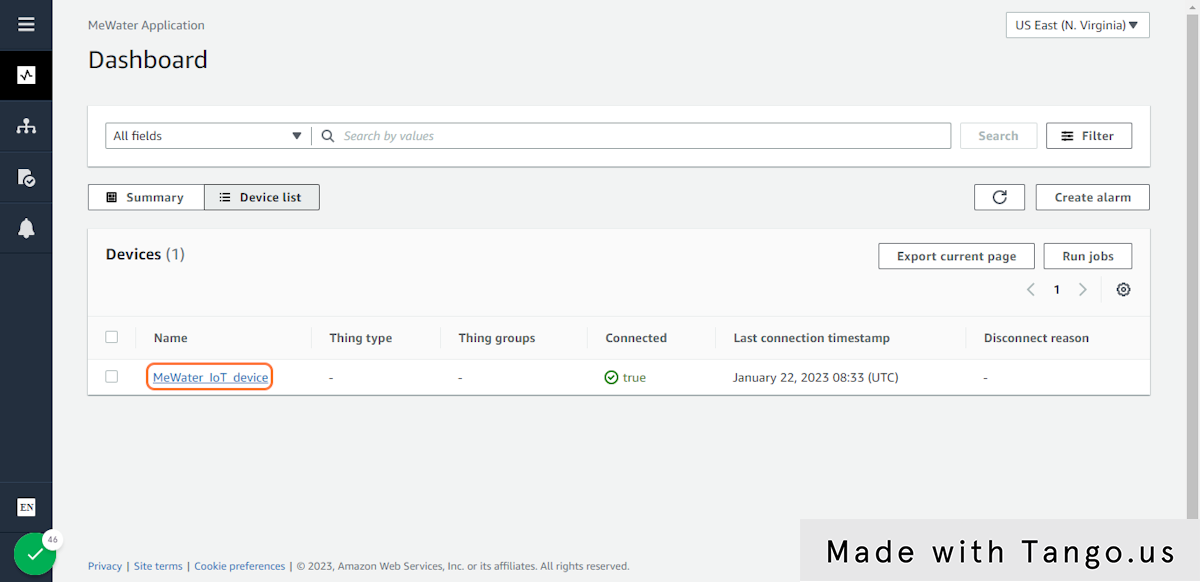
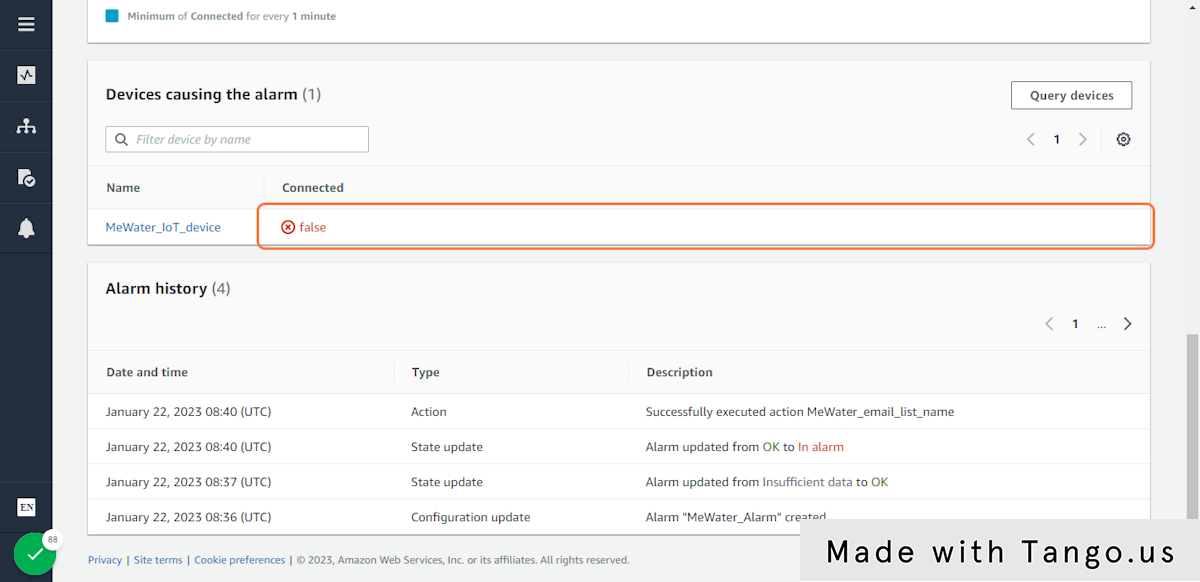
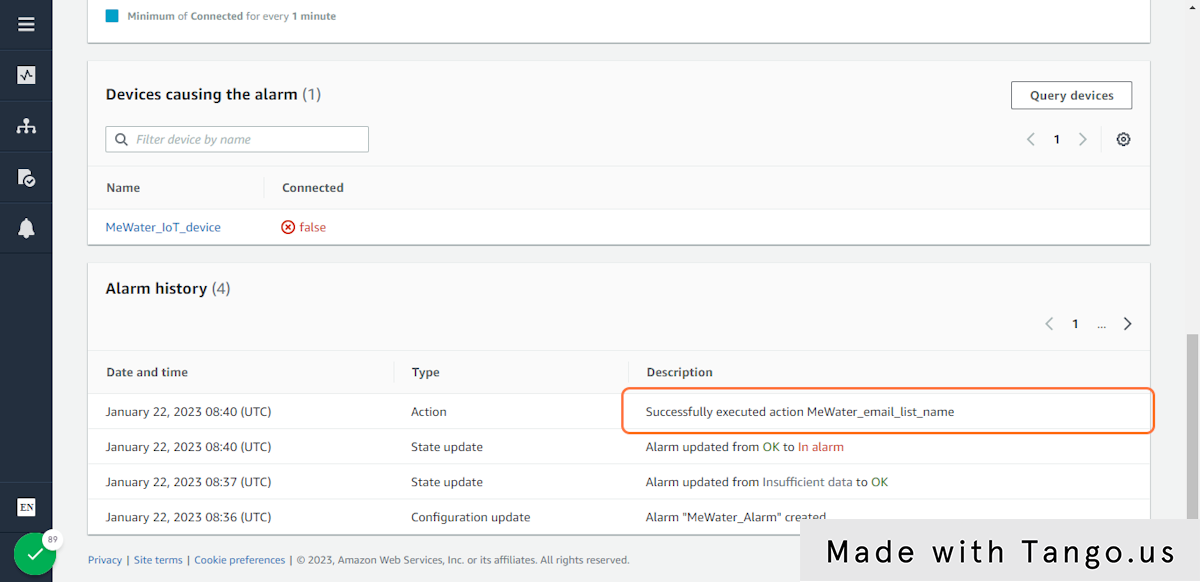
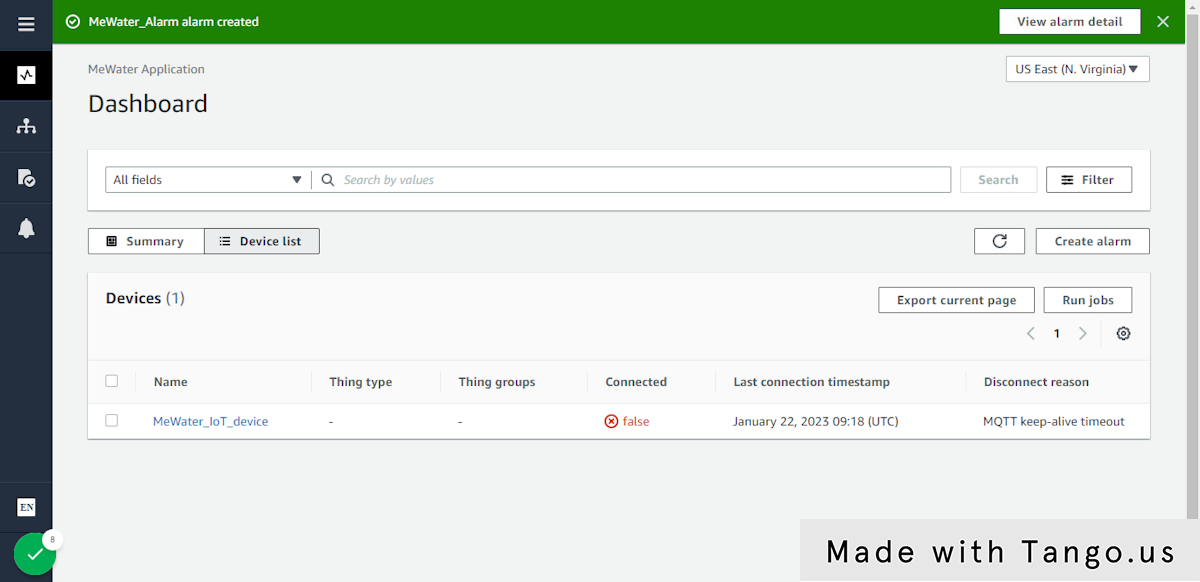
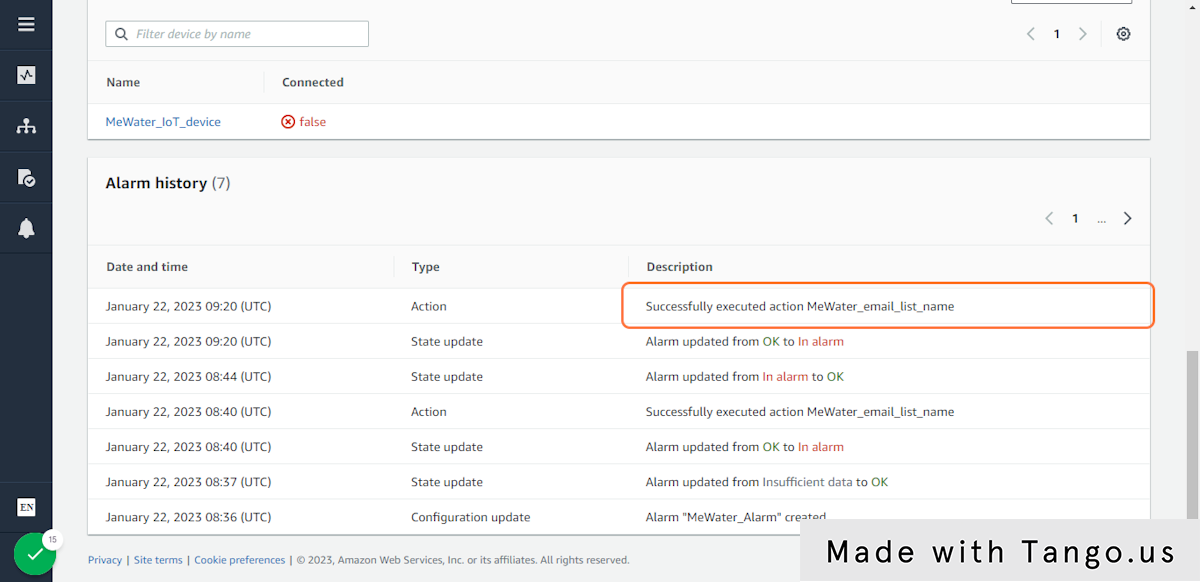
42. You should see the Last connection state as 'true'
43. Click on Create alarm
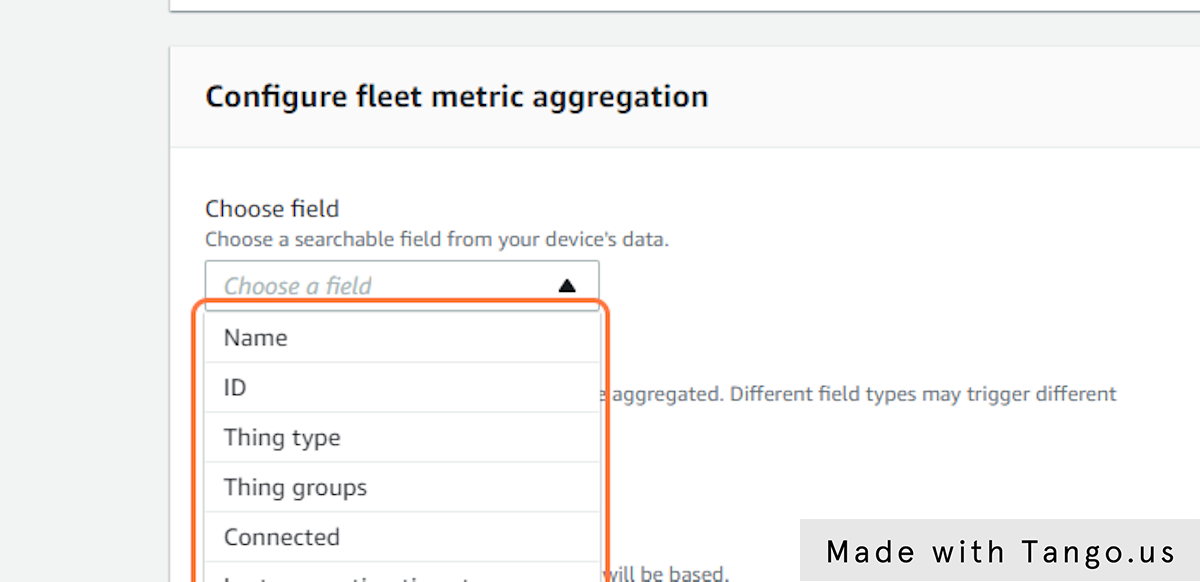
44. Click on Choose field
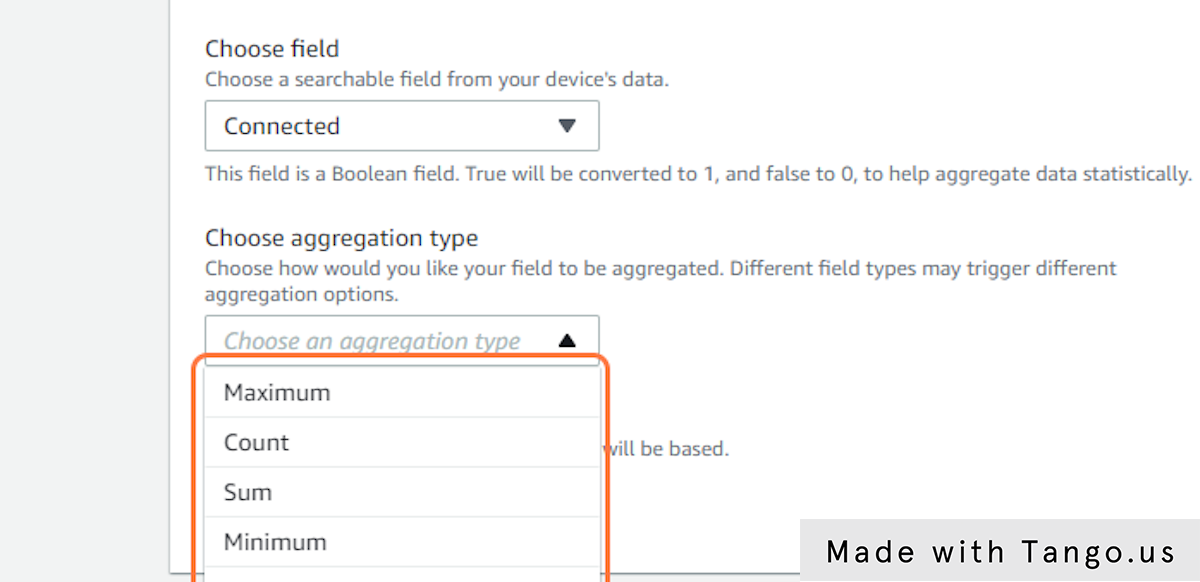
45. Click on Choose aggregation type
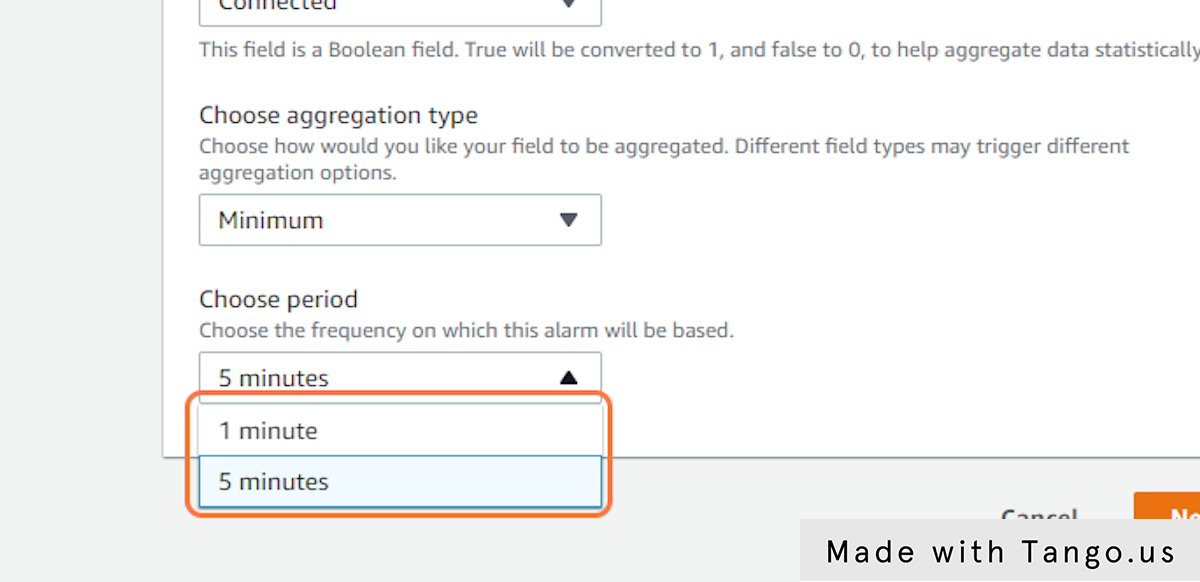
46. Click on Choose period
47. Click on Next
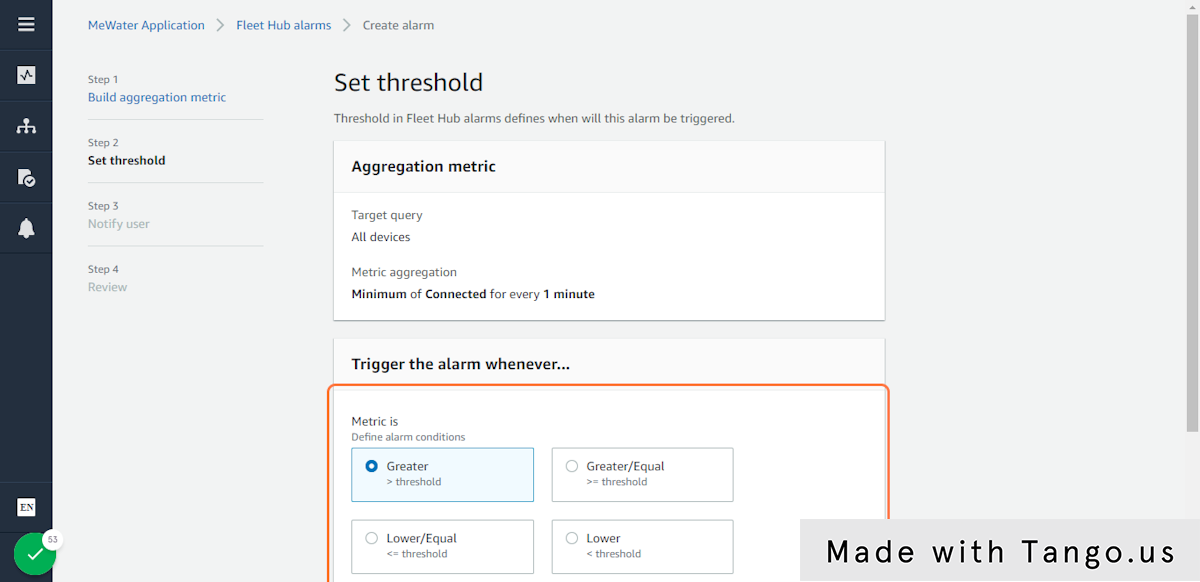
48. Click on radiogroup
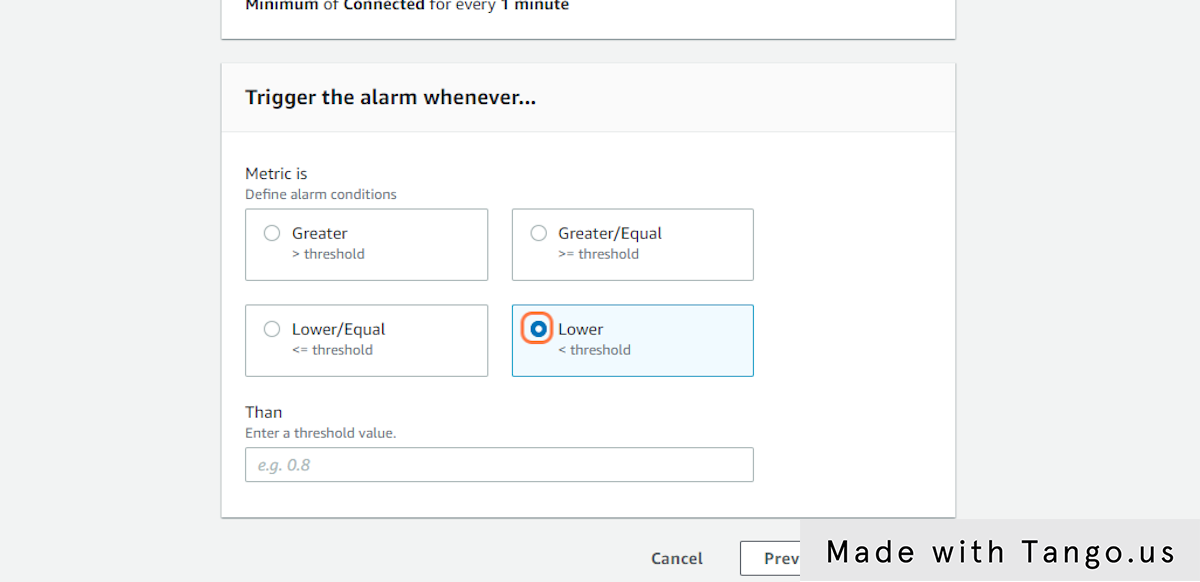
49. Select "LessThanThreshold"
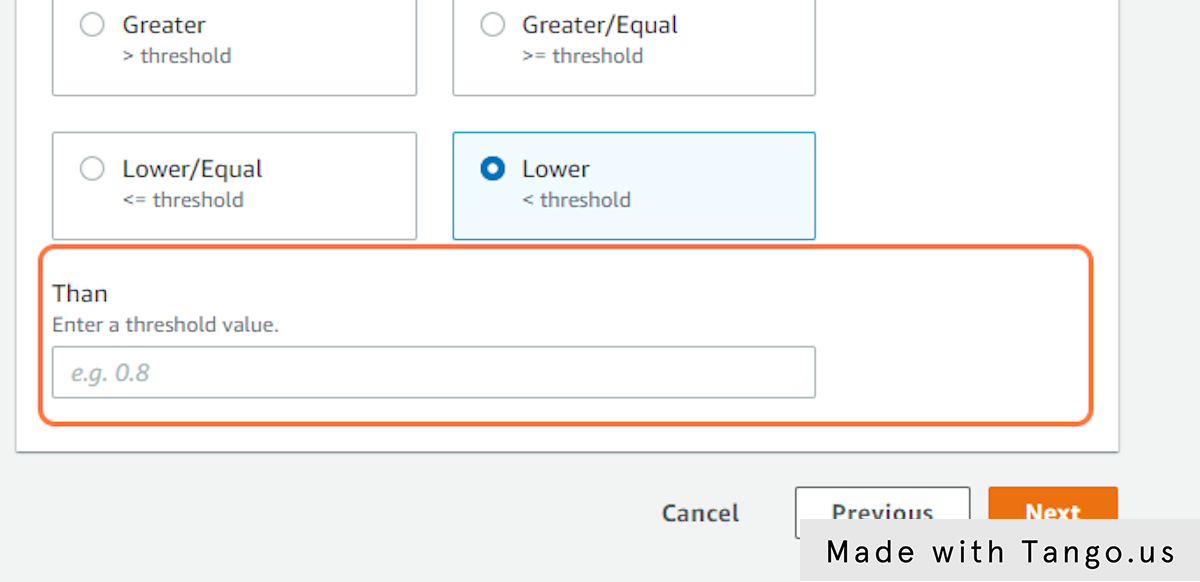
50. Type "1"
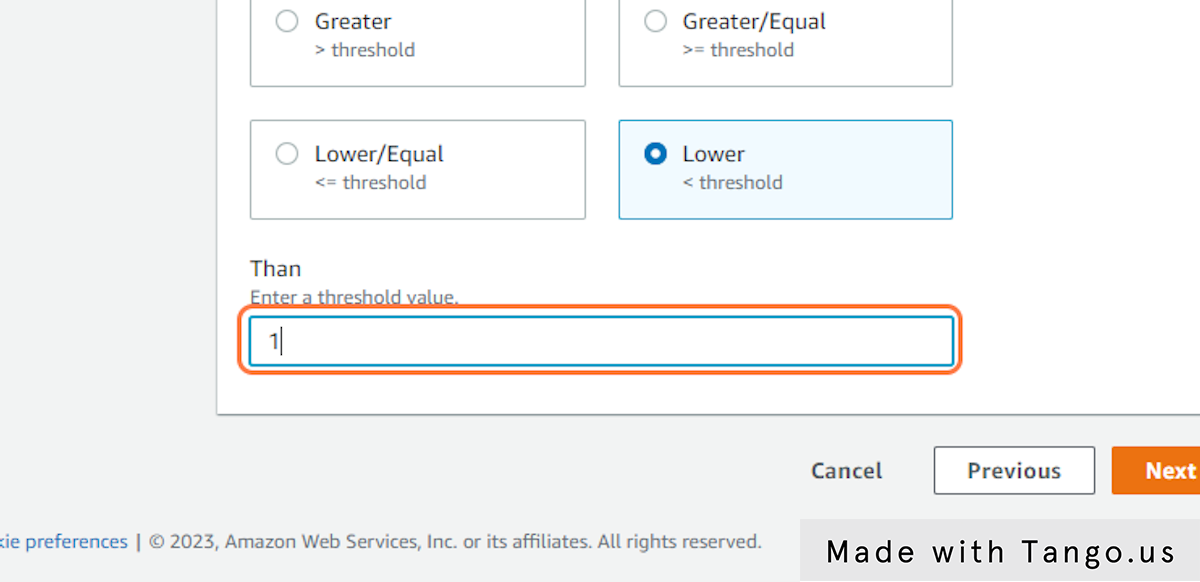
51. Click on Next
52. Type "MeWater_email_list_name"
53. Type "[email]"
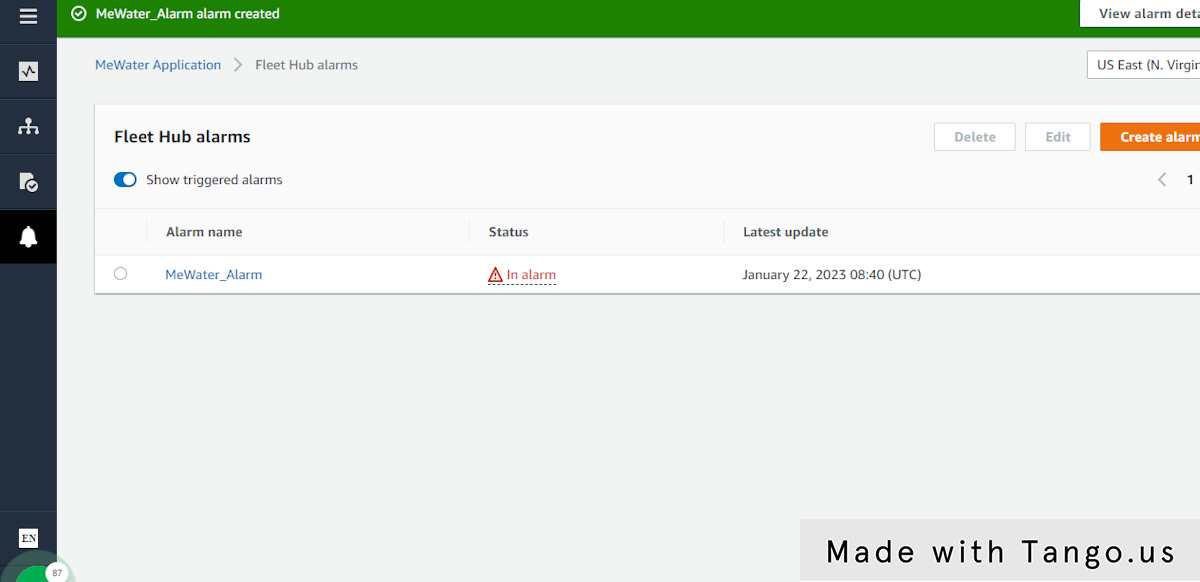
54. Type "MeWater_Alarm"
55. Type "Alarm for MeWater IoT devices"
56. Click on Submit

57. Click on table
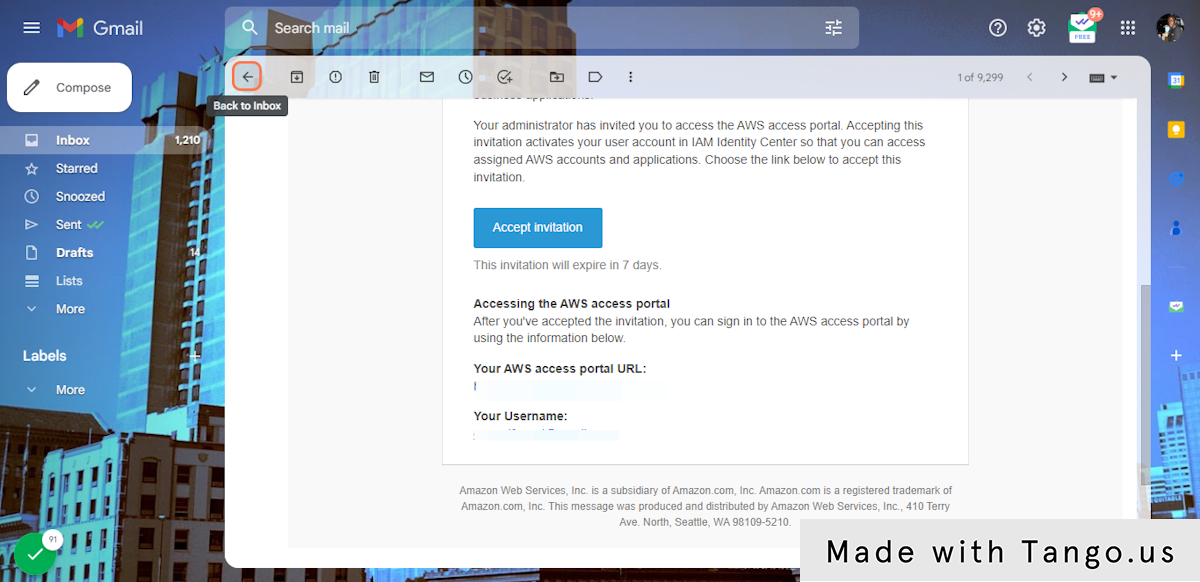
58. Click on Notify…
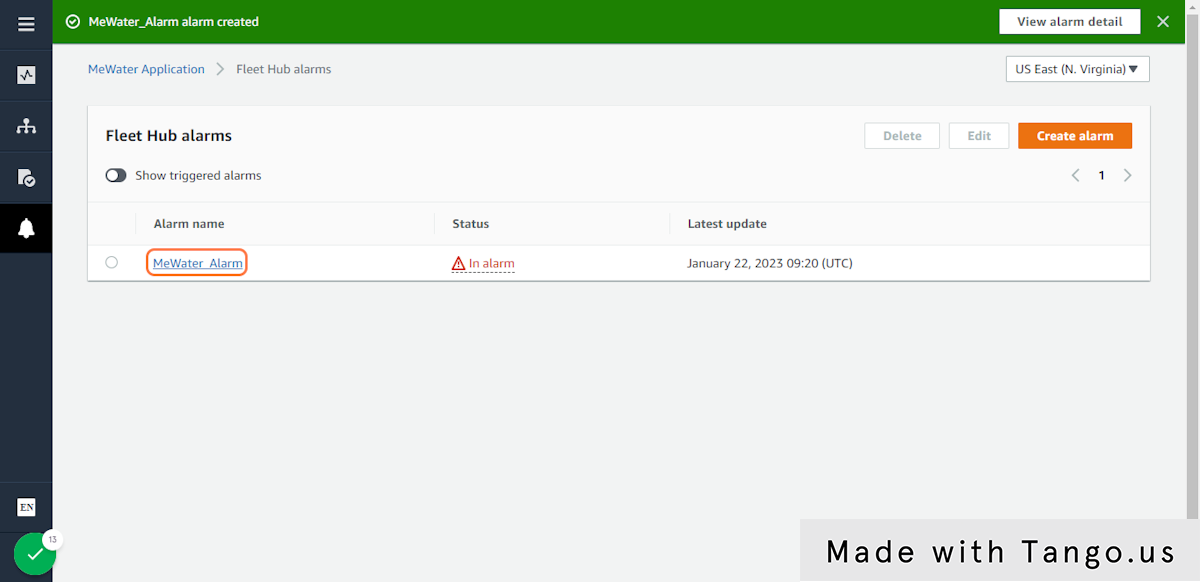
59. Click on Fleet Hub alarms
60. Click on table
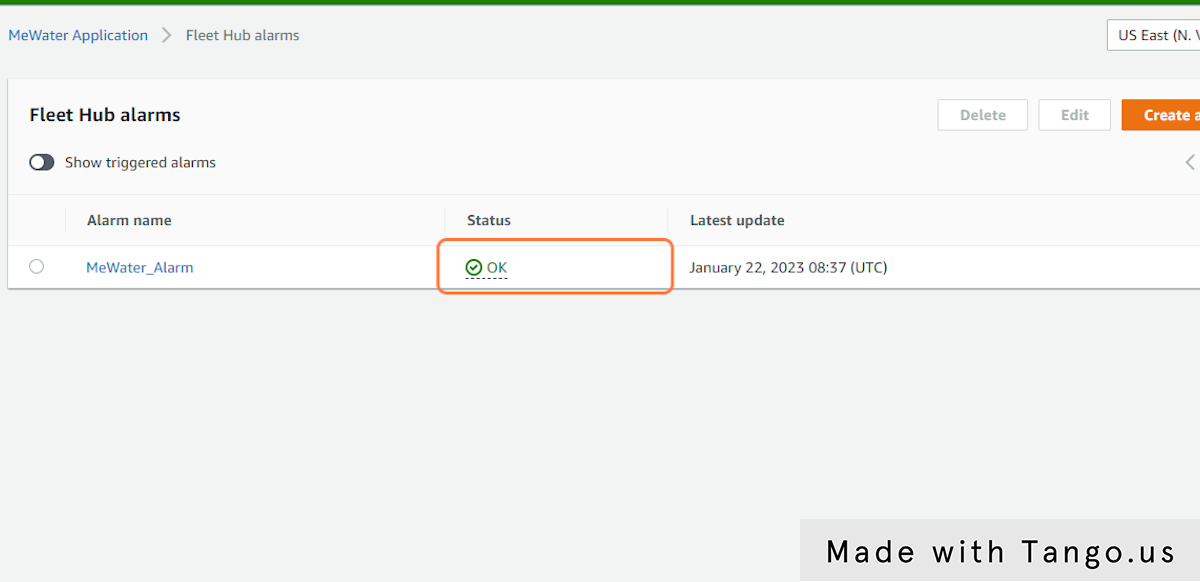
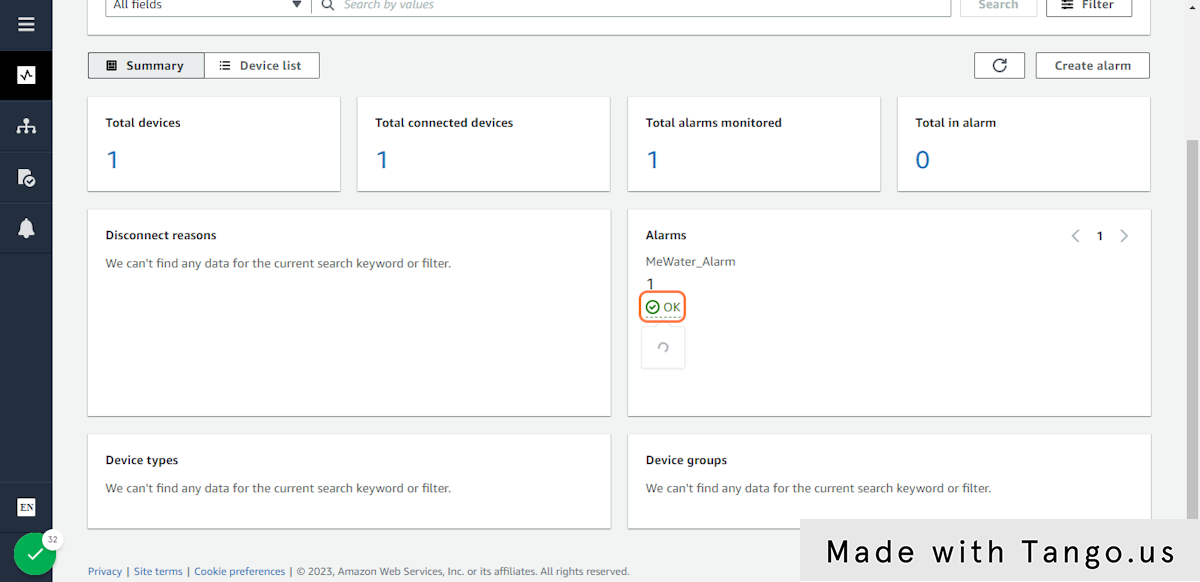
62. Click on image
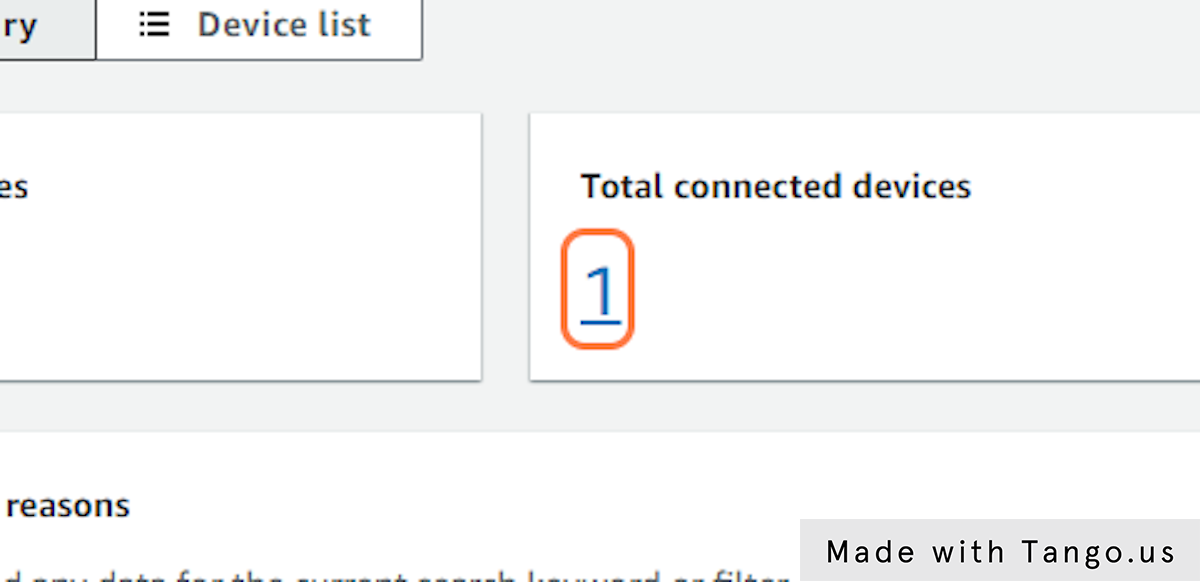
63. Click on 1
64. Click on table
65. Click on table
66. Click on image
67. Click on table
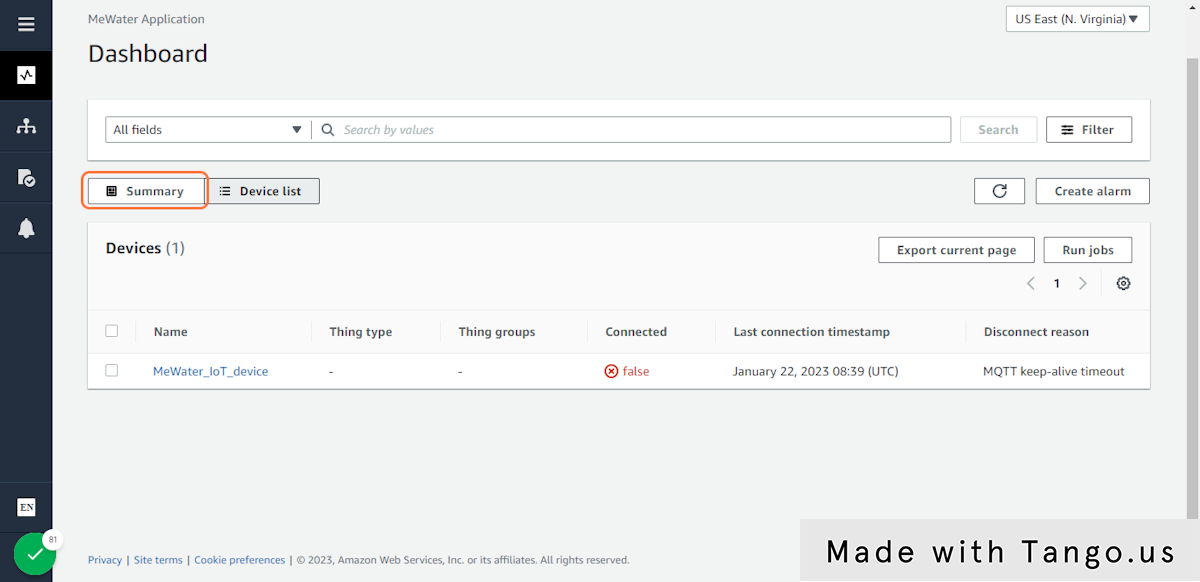
68. Click on Summary
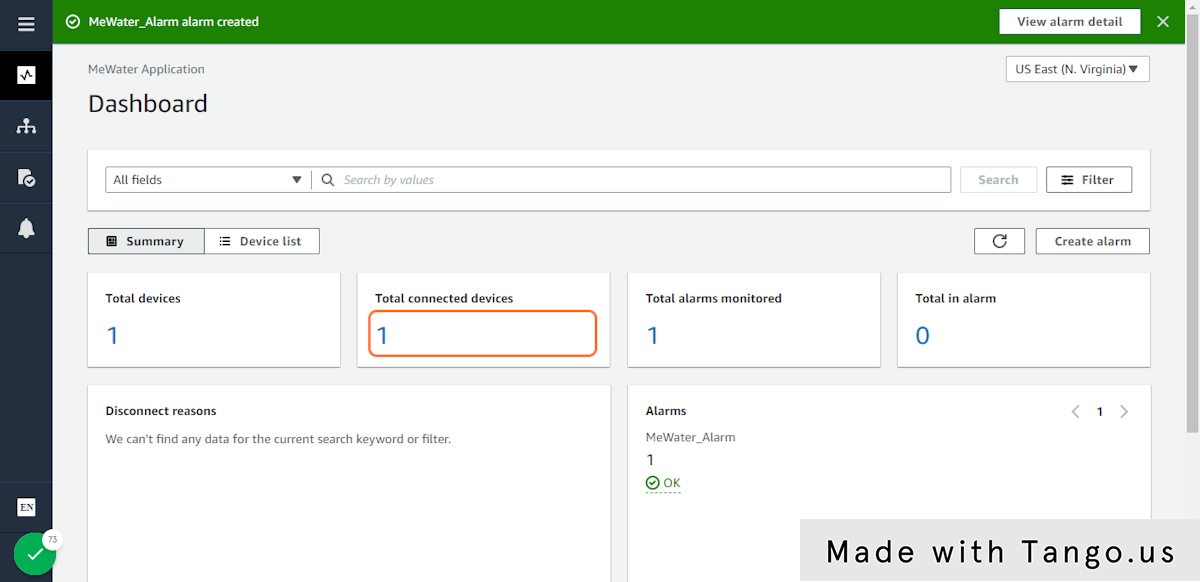
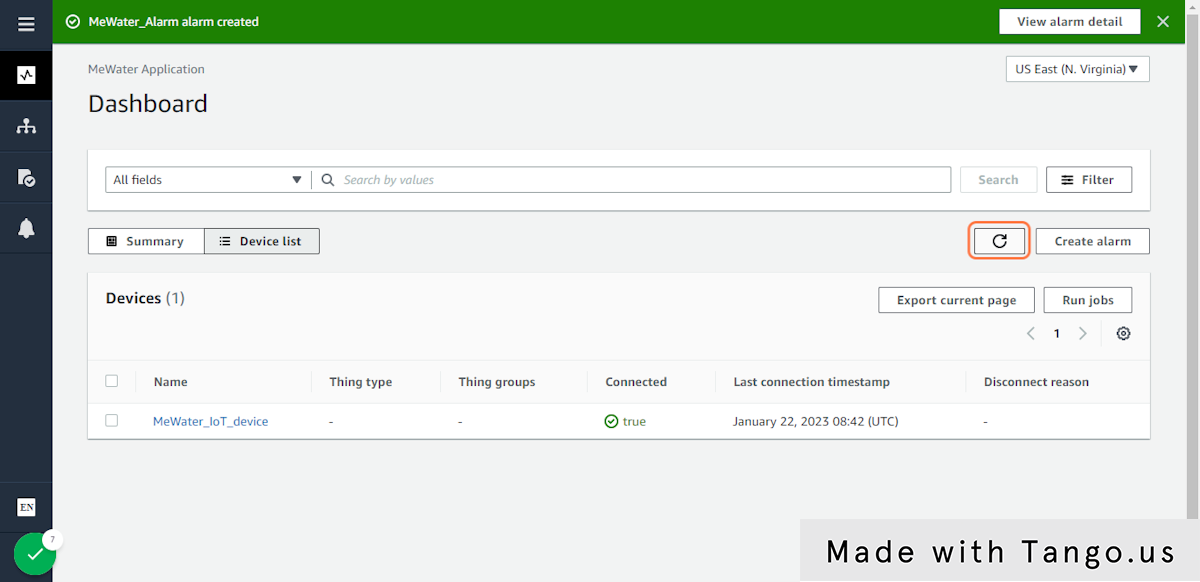
69. Refresh page

70. Click on image
71. Click on table

72. Check Show triggered alarms
73. Click on table
74. Click on table
75. Go to Invitation to join IAM Identity Center (successor to AWS Single Sign-On)
76. Click on Back to Inbox
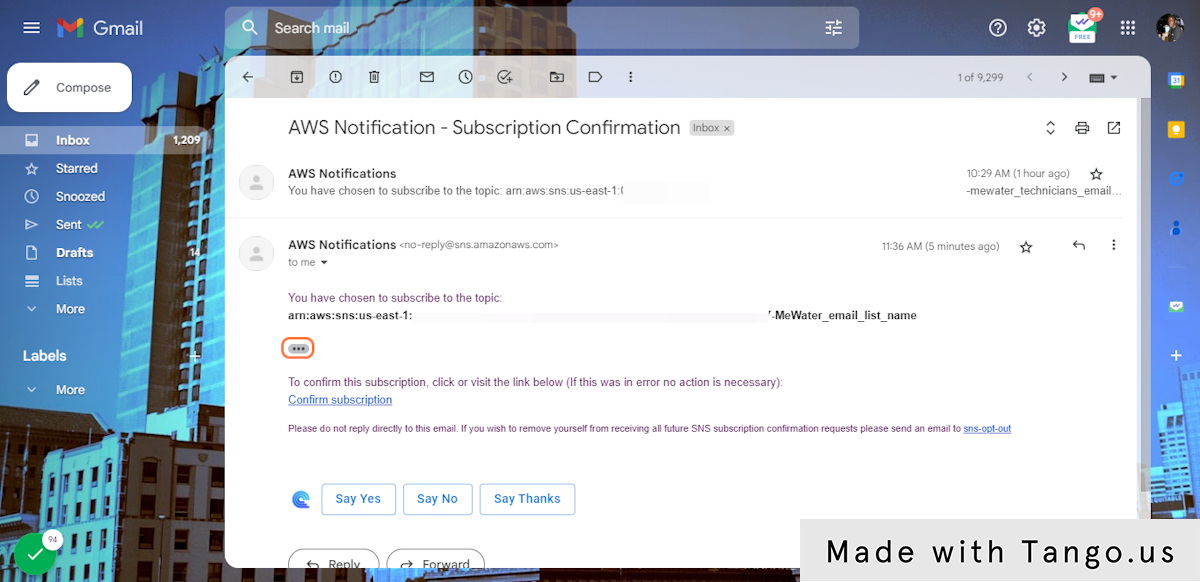
77. Click on Inbox…

78. Click on AWS Notification - Subscription Confirmation

79. Click on image
2. Click on 1
3. Click on MeWater_IoT_device
4. Click on Devices
5. Click on highlight
6. Click on highlight
7. Click on table
8. Click on image
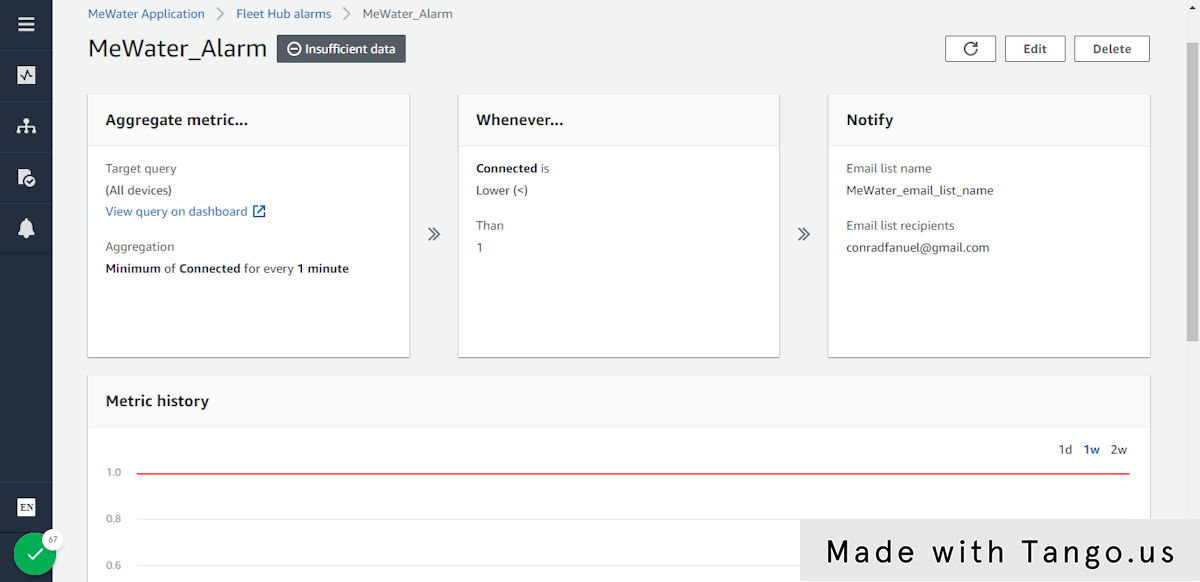
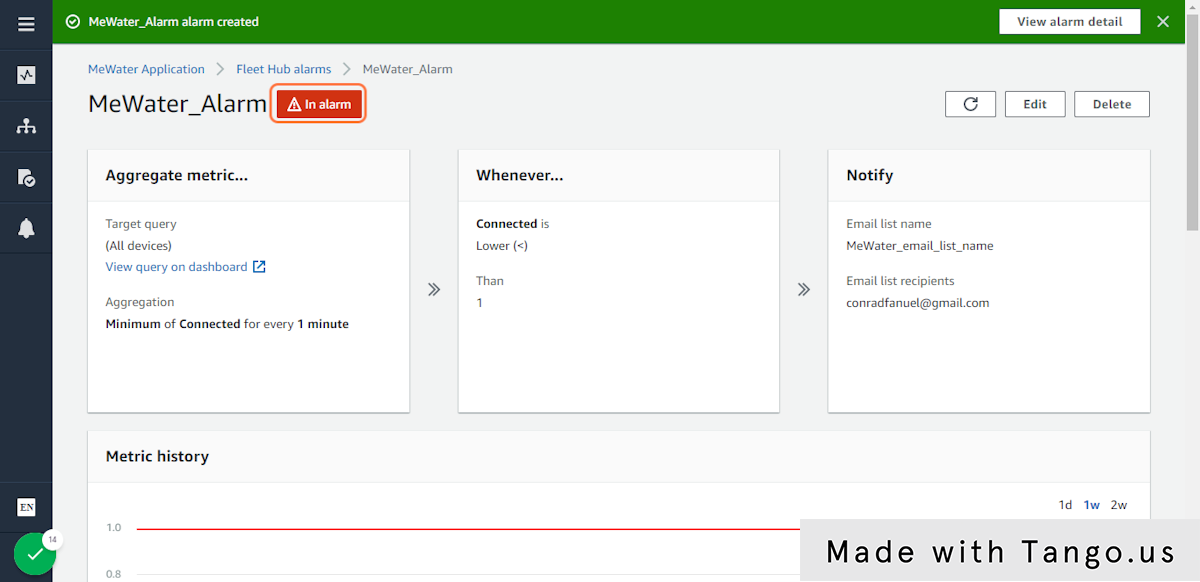
9. Click on MeWater_Alarm

10. Click on Fleet Hub alarms

11. Click on MeWater_Alarm
12. Click on In alarm
13. Click on table
15. Click on Inbox…

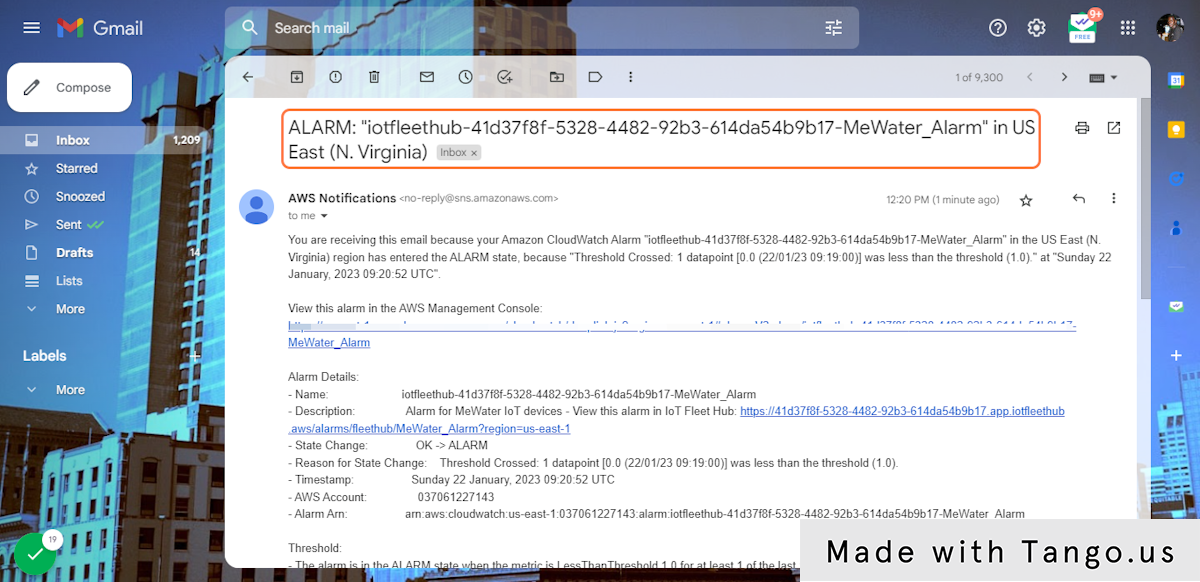
16. Click on ALARM

17. You should be able to see the contents of the alarm
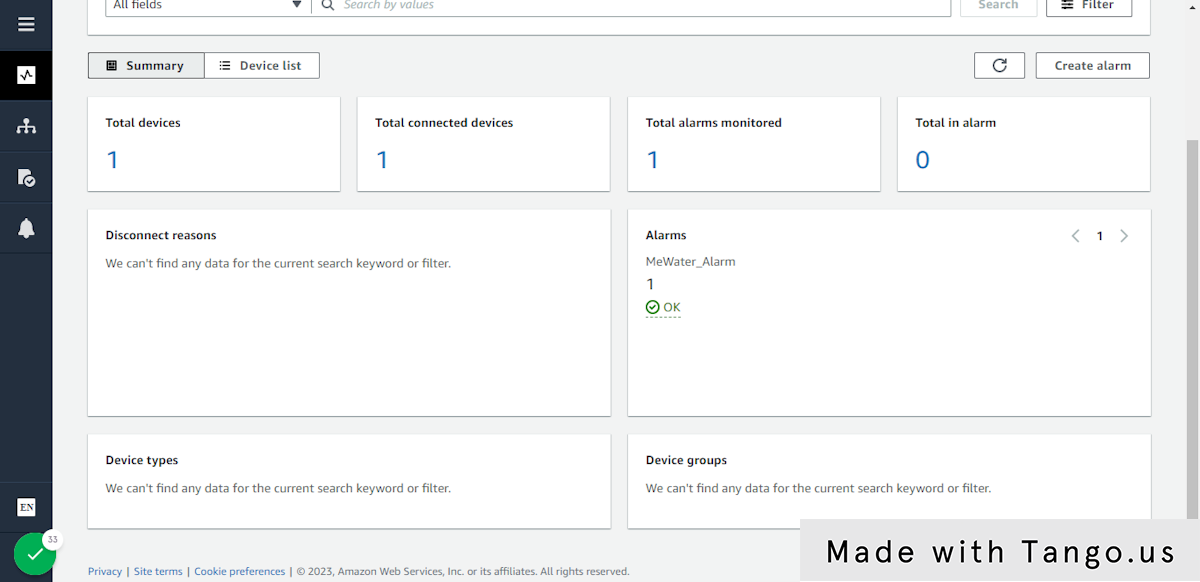
19. Click on Fleet Hub alarms

20. Uncheck Show triggered alarms

21. Click on image
22. Click on 1
23. Click on image
24. Click on Summary
25. Click on OK
26. Click on Alarms…
27. Click on table

28. Click on MeWater_Alarm…
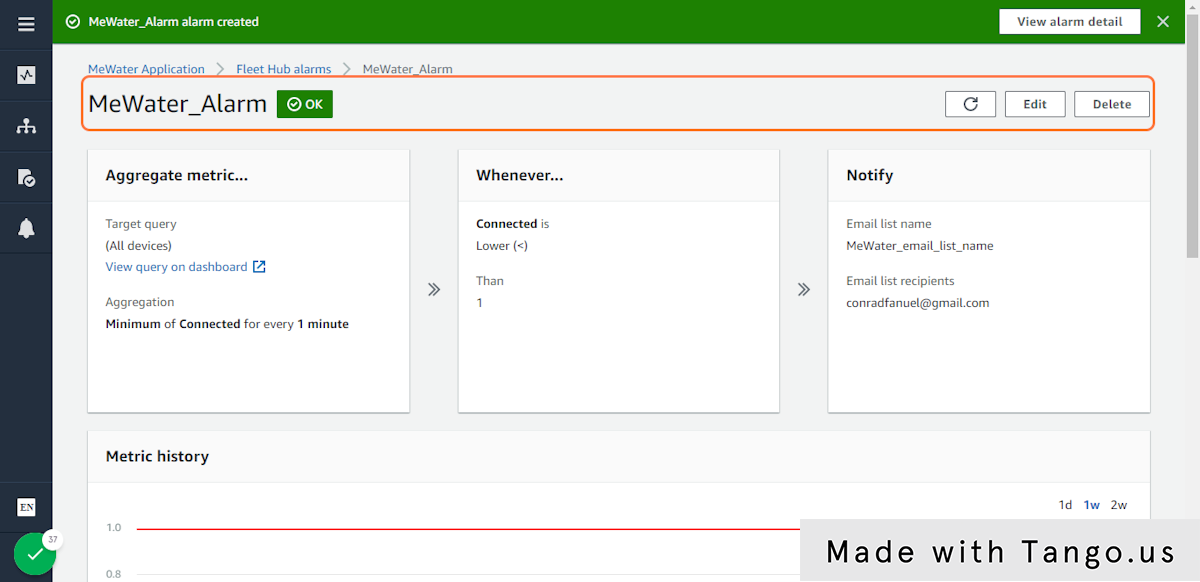
29. Click on image
30. Click on Show triggered alarms…
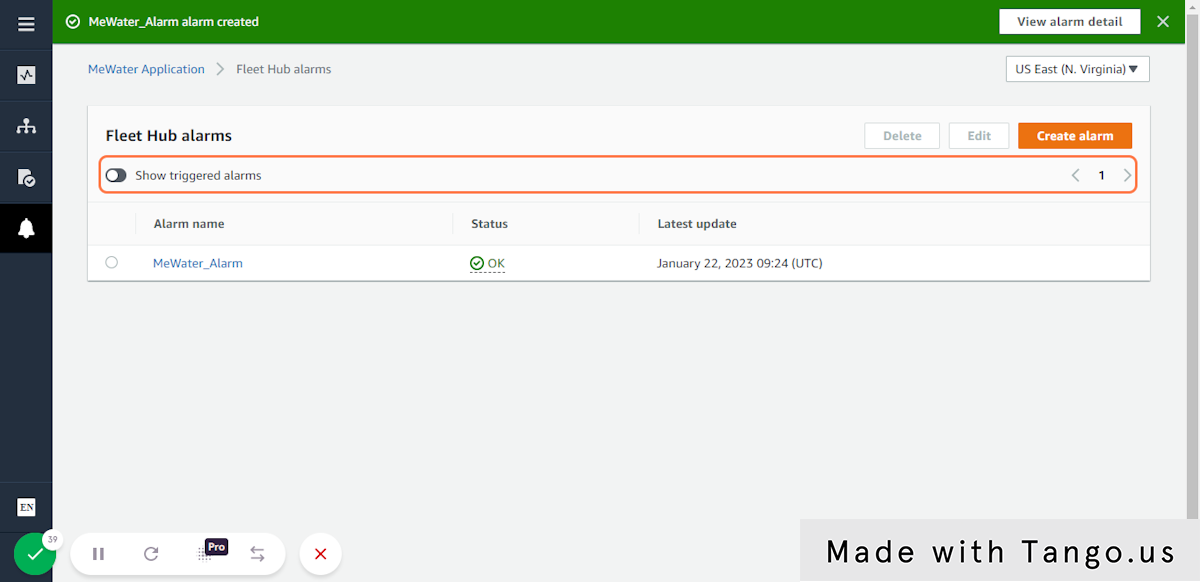
31. Check Show triggered alarms


